|
If you need help or support with anything, just let us know. We're here for you!
Account Basics
-
|
| How To Create A Sender Profile |
|
-
|
| How to Set Up SPF, DKIM, and DMARC Records in Blastable |
|
Email authentication is vital to any organization’s cybersecurity program. Think of SPF, DKIM, and DMARC as a trio of security guards for your email domain, each with a unique role in keeping your messages safe and trustworthy.
Together, these records help protect your domain from being misused for spam or phishing attacks, ensuring that your emails are secure and your reputation stays intact.
This guide will teach you the basics about these three records and how to set them up in your Blastable account.
Importance of Setting Up Your Records
These records are authentication methods used to improve the security of your emails, protect your domain from unauthorized email sending, and improve deliverability and response rates.
Basically, these three authentication methods are important for preventing spam, phishing attacks, and other email security risks.
Definition of SPF, DKIM, and DMARC Records
1. SPF (Sender Policy Framework): SPF ensures that only authorized servers can send emails on behalf of your domain. If an email comes from an unexpected server, SPF flags it as suspicious. SPF is the initial defense in our email authentication toolkit, helping to keep your inbox free from messages that might end up in the spam folder.
It is important to note that only one SPF record is allowed per domain.
2. DKIM (DomainKeys Identified Mail): DKIM is the next level of authentication. It is like a stamp of authenticity that proves the email genuinely came from your domain.
This means that each email sent from your domain will have a unique digital signature, ensuring that messages are not sent without authorization or impersonated.
Setting up your DKIM records includes generating a DKIM key, creating a DKIM TXT record, and enabling DKIM signing.
3. DMARC (Domain-based Message Authentication, Reporting & Conformance): DMARC acts as a coordinator that uses the information from SPF and DKIM to decide what to do with emails that don’t pass the checks. It also provides you with reports on how your email domain is being used, helping you spot any potential abuse or issues.
In other words, DMARC is like a security guard, ensuring that both SPF and DKIM are working together to protect your domain from email threats.
How to Setup Your Records
Now we have more information about these three records and the importance of setting them up for your domain, let’s review the steps to generate them in your Blastable account.
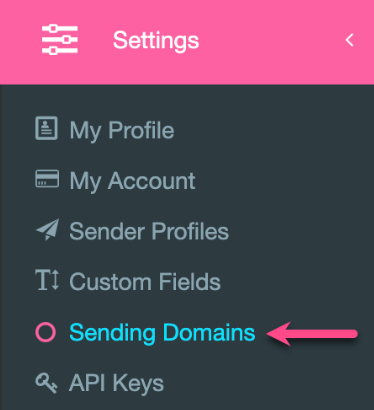
1. Go to Settings, then Sending Domains.
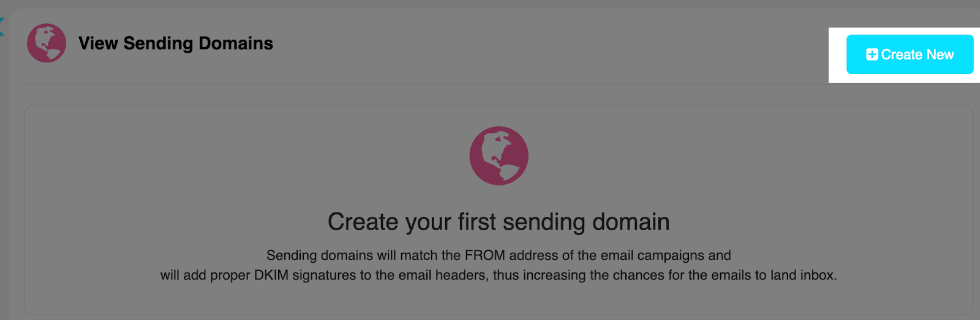
2. Click on Create New.
3. Add the name of the domain you’ll use to send your emails.
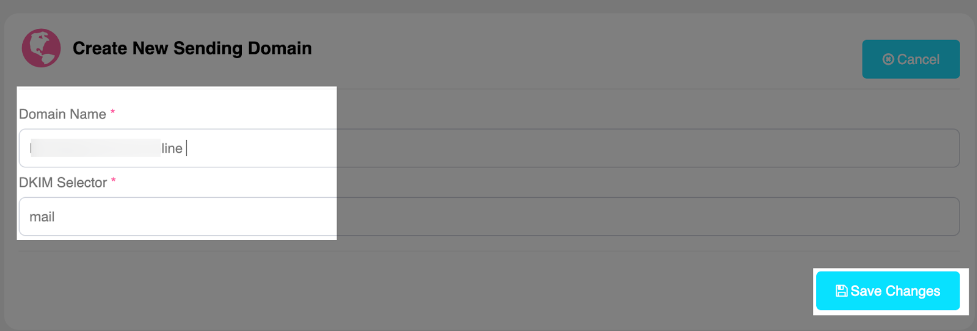
4. Leave the word “mail” as the DKIM Selector and Save Changes to generate the records.
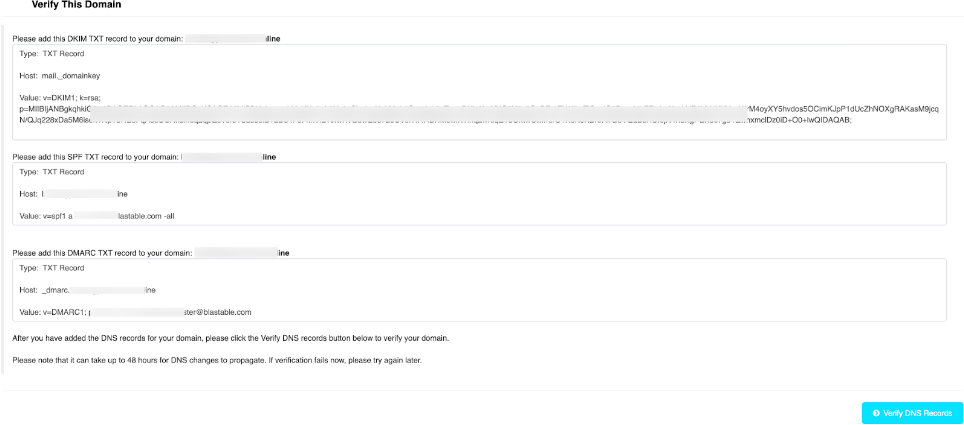
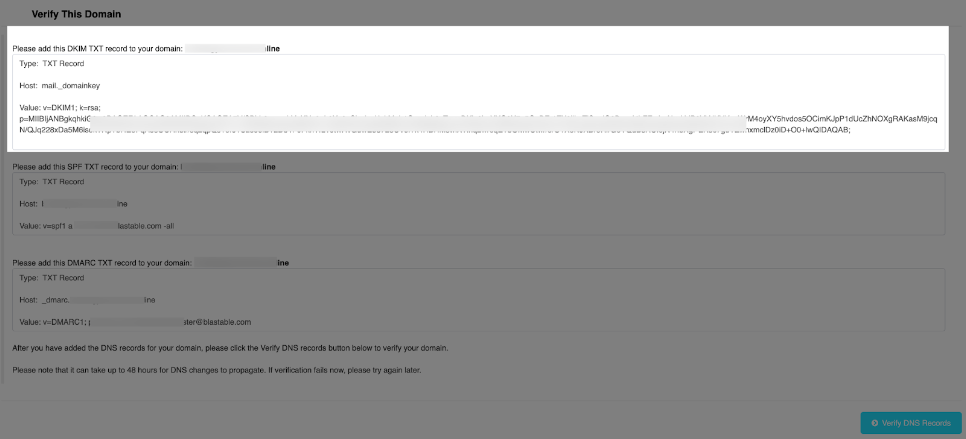
5. This is an example of how your records will look like. (For privacy reasons, some areas of the text are blurred).
6. Back in your Domain Host, locate your DNS area. For this example, I’m using Namecheap. Keep in mind that it will look different according to your Domain host.
7. Create a new TXT record for the DKIM using the values generated in Blastable.
This is how it will be added to your domain’s DNS records:

8. Create a second TXT Record for the SPF using the values generated in Blastable.
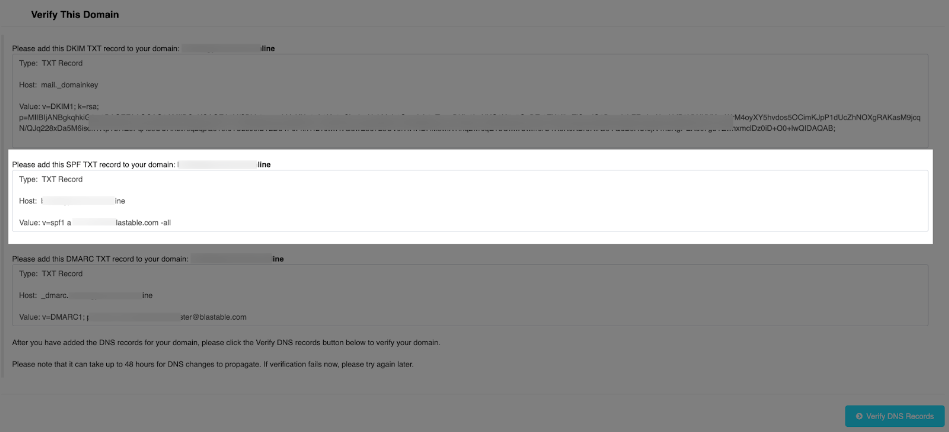
This is how it will be added to your domain’s DNS records. Replace yourdomain.com with your domain.

9. Create a third TXT record for the DMARC using the values generated in Blastable.

This is how it will be added to your domain’s DNS records.

10. After you have added the DNS records for your domain, please click the Verify DNS Records button below to verify your domain.
Please note that DNS changes can take up to 48 hours to propagate. If verification fails now, please try again later.
Once the records are verified you will see this confirmation banner at the top of the page.

You will also see the confirmed verification in the Sending Domains dashboard.

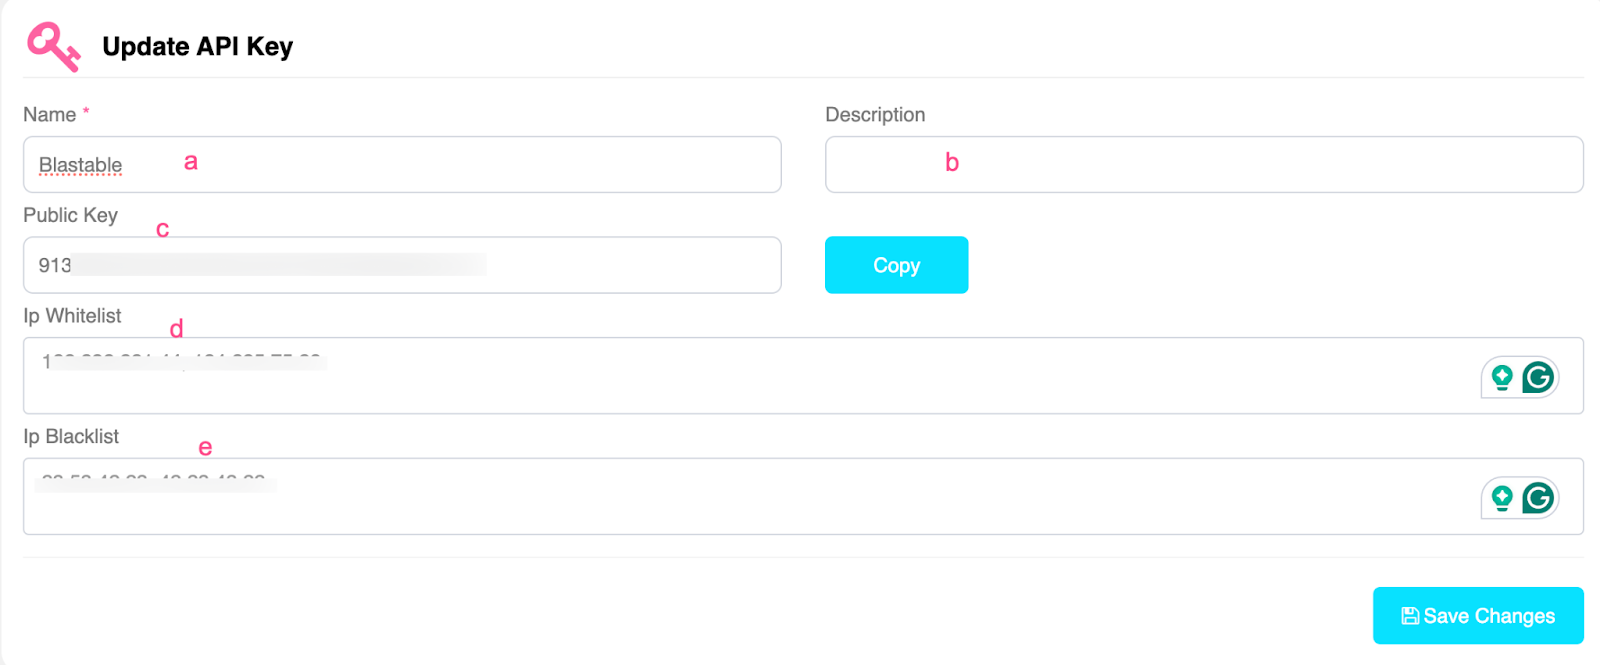
How to Update Your Records
If at some point you need to edit your Sending domain information, you can do it by visiting Settings, Sending Domains, and scrolling down at the bottom of the page.
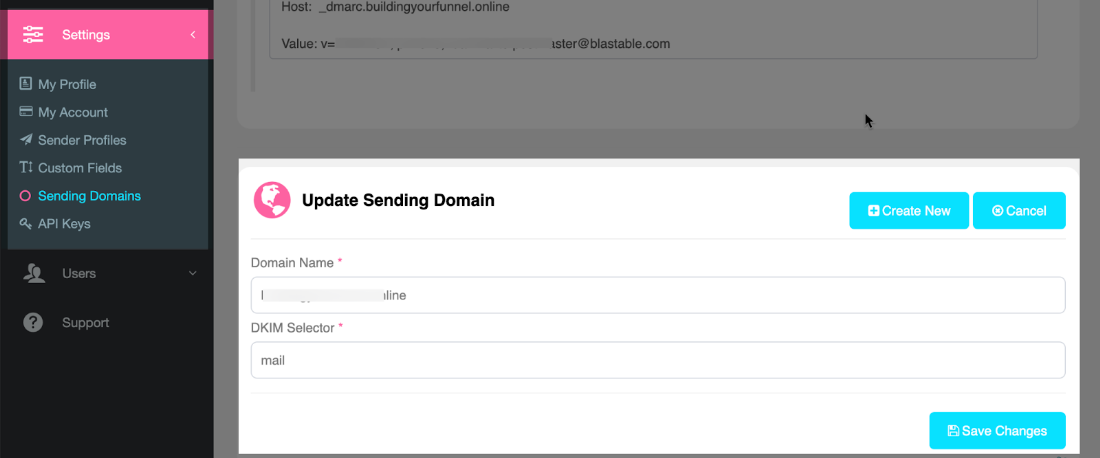
Make the needed edits and Save the changes when finished.
Congratulations! Now you know how to setup your SPF, DKIM, and DMARC Records in your Blastable account.
If you have any questions or concerns, feel free to reach out to our team!
We're available and ready to help at support@blastable.com or via our live chat widget.
Cheers,

|
|
-
|
| How to Create and Manage Users |
|
Sometimes, we have people helping us manage our Blastable account. If that’s your case, you can definitely use this feature. You can add additional users and manage different levels of permission for them.
If you eventually don’t need additional users in your account, you can quickly remove their access.
Please note: new users are only available for enterprise accounts.
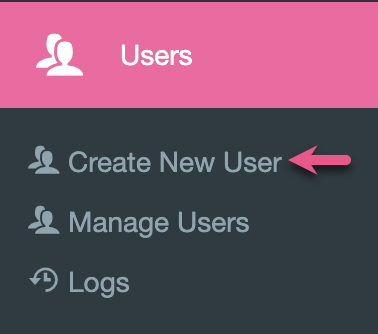
Create a New User
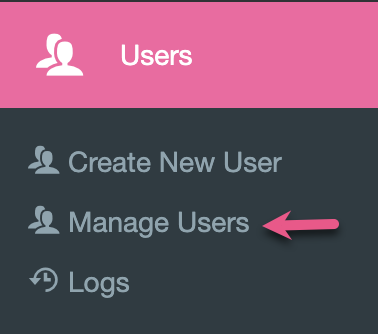
1. From the main menu, click on Users, then Create New User.
2. Fill in the needed information about the new user.

- User’s first and last name.
- User’s email address.
- Status.
- Select whether you want to send details via email or not.
- Add the password from your Blastable account.
- Confirm password.
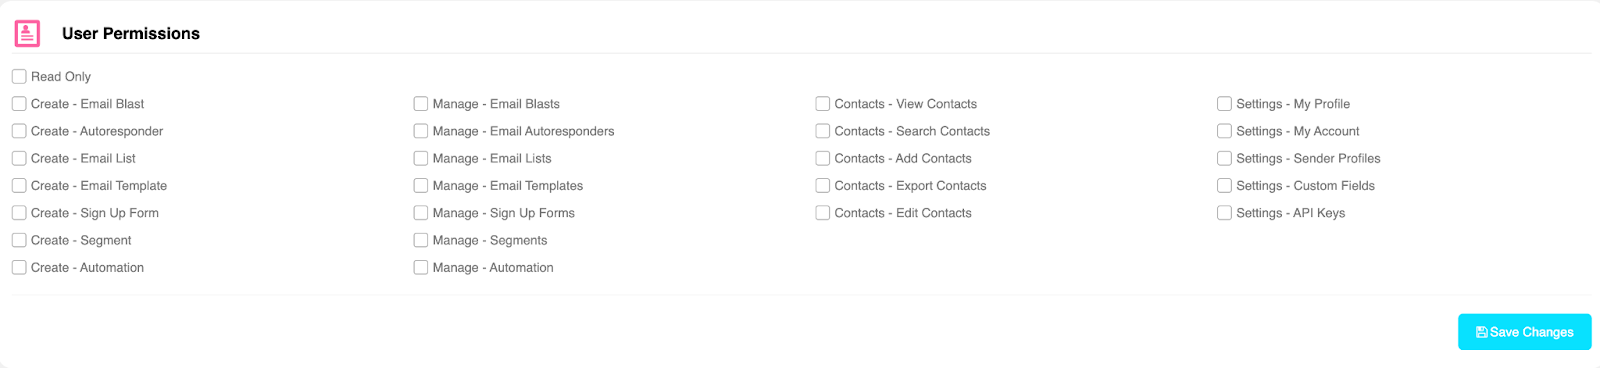
3. Select the User Permissions and click on Save Changes.
4. If the process is successful, you’ll see these banners at the top of the page.

5. An email will be sent to the new user’s email address to confirm their account.
Levels of Permission
You can assign different permission levels to each user based on the activities they’ll perform inside your account.
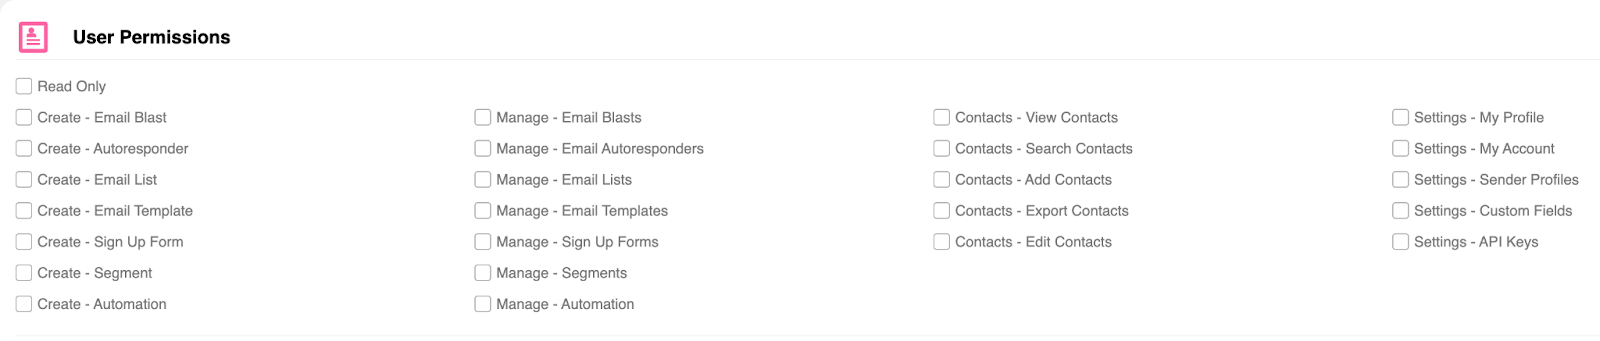
For example, if you have someone to help you manage your contacts, you can select only the Permissions related to contacts.

You can assign more than one permission to each user.
Manage Users
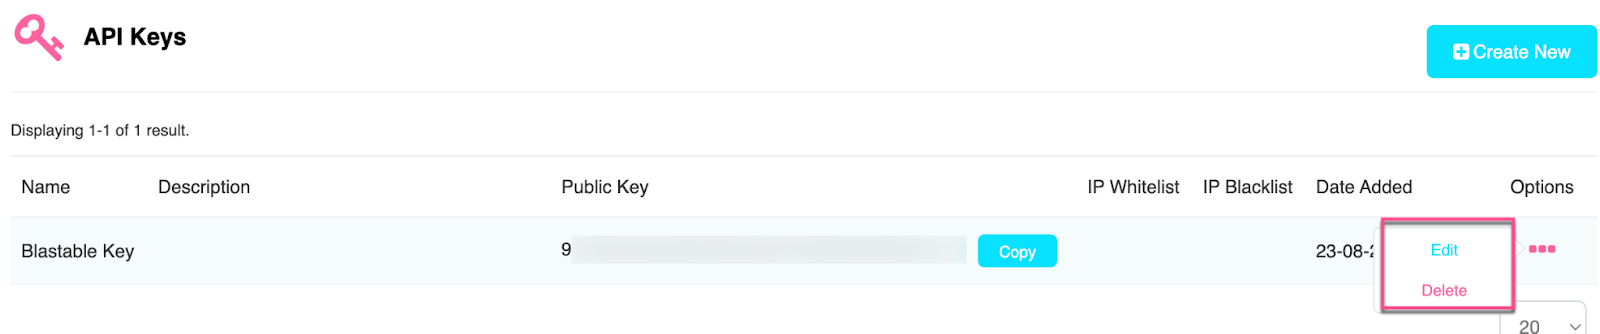
1. Permissions can be edited at any time. To edit a user, visit Users and then Manage Users.
2. Click on the three dots on the user's right side.
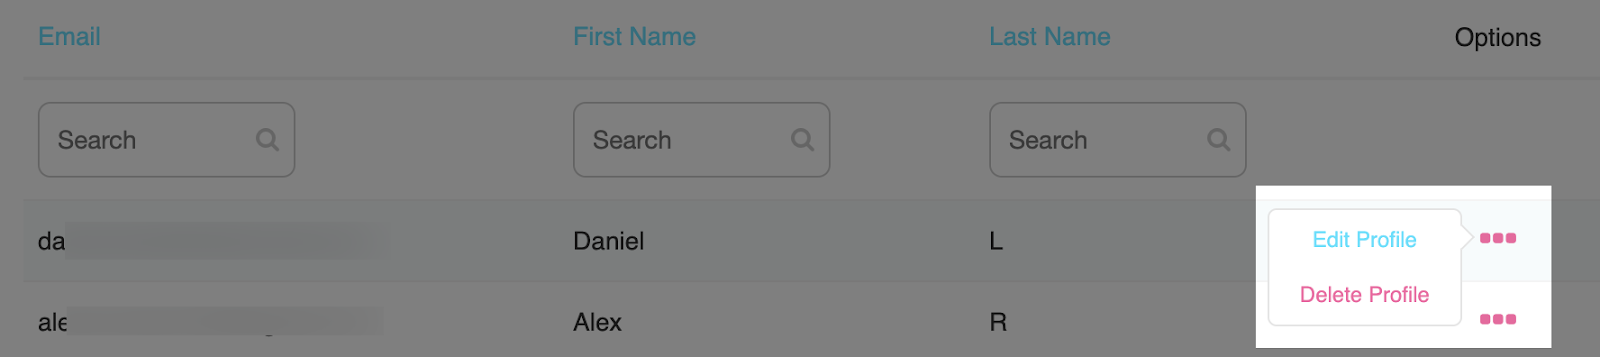
3. Click on the three dots on the user's right To edit a user, click on Edit Profile. Make the needed changes and click on Save Changes.
4.
To delete a user, click on Delete Profile.
Important note: For security reasons, you will be asked to type your password anytime a change is made.
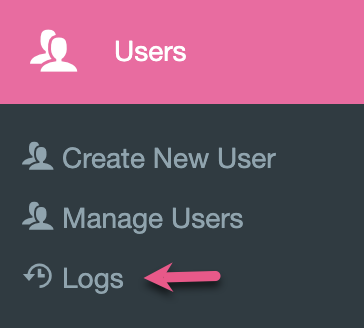
Logs
To access the login records, click on Users, then Logs.
2. You will find the history of your users' logs there, showing their IP Addresses and the exact date and time they accessed the account.
This is valuable information since you will confirm their logs with the activity performed in your account.
If you have any questions or concerns, feel free to reach out to our team!
We're available and ready to help at support@blastable.com or via our live chat widget.
Cheers,
|
|
-
|
| Using Multiple Sender Profiles |
|
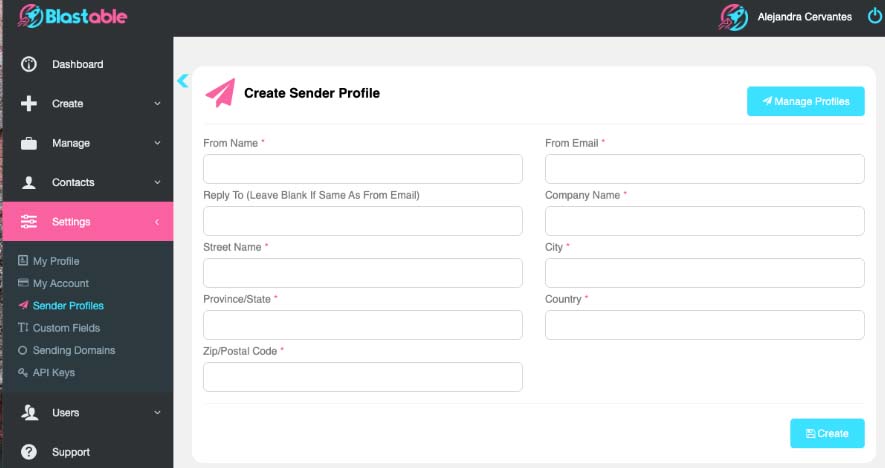
Your Sender Profile is the sender information that will be displayed when you send emails. This is the email address that the recipient would see and reply to if needed.
Creating multiple sender profiles allows you to handle different aspects of your business email sends. For example, you can use one sender profile to send normal commercial emails, another for transactional, and a third one for special offers.
Create and Manage Multiple Sender Profiles
1. To create a Sender Profile, you need to follow these instructions.
2. To create multiple Sender Profiles, you must repeat the process.
Please, keep in mind that only one sender profile can be created per business email address.
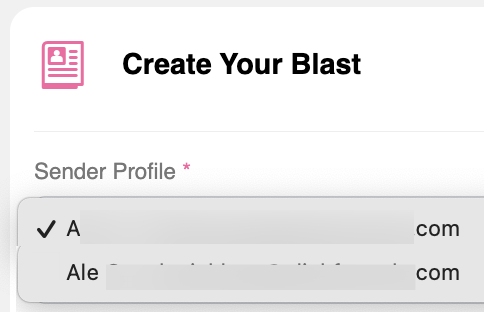
3. When creating your Email blast, you can select the Sender of your choice from the drop-down menu.
If you have any questions or concerns, feel free to reach out to our team!
We're available and ready to help at support@blastable.com or via our live chat widget.
Cheers,
|
|
-
|
| How to Create Custom Fields
|
|
Custom Fields capture additional information about customers. For example, you could create a custom field to store each customer's preferred contact method.
When collecting information, it is essential to keep it organized and categorized; custom fields make that task easier.
How to Create Custom Fields
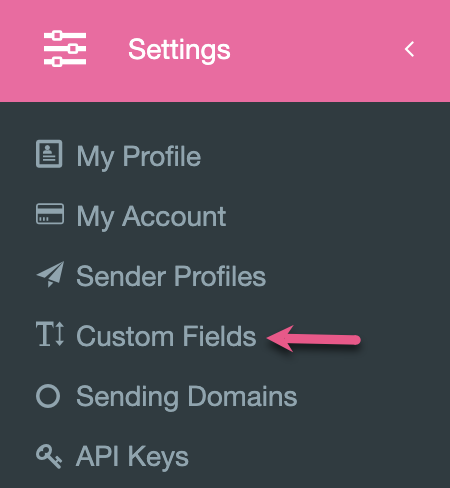
1. From the main menu, click on Settings, then Custom Fields.
2. Click on Create New.
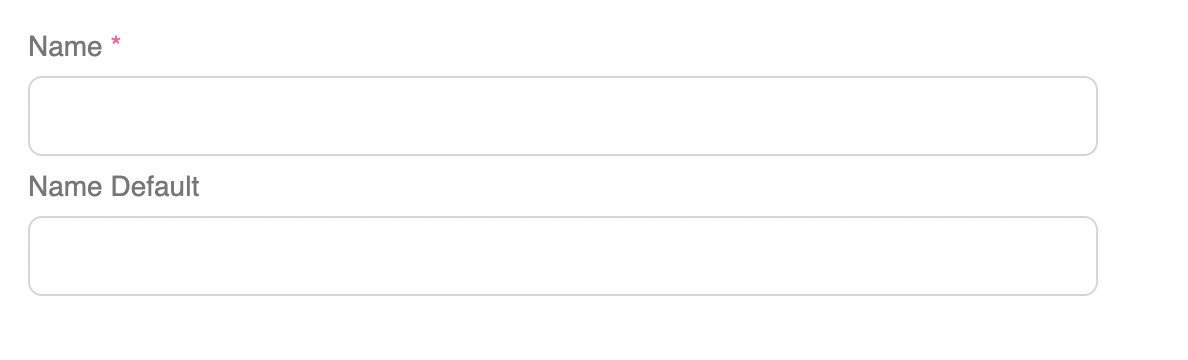
3. Add a Name and a Name Default. Once you complete this information Save the Changes.
4. A tag will be generated for your input field after creating it. Example:

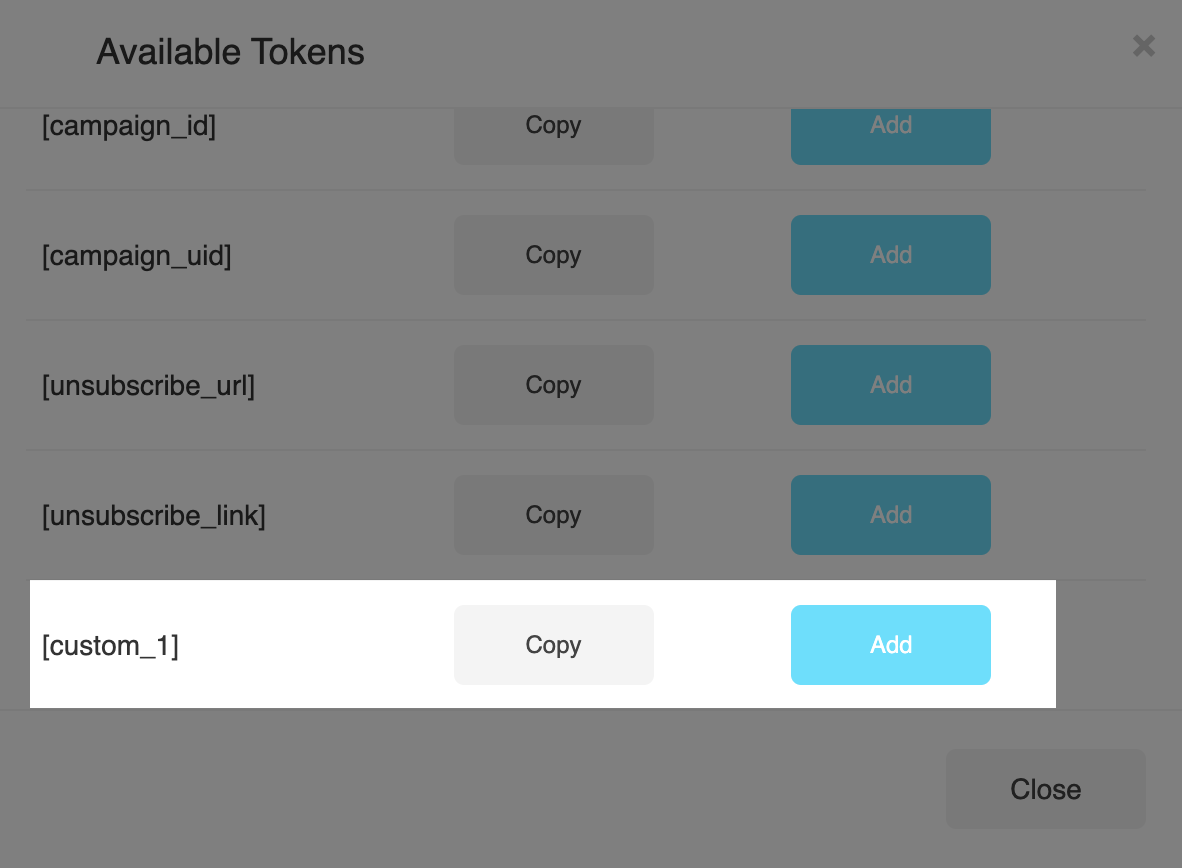
5. Once your custom field is created, you can add it anytime in your blasts from within the Tokens area.
If you have any questions or concerns, feel free to reach out to our team!
We're available and ready to help at support@blastable.com or via our live chat widget.
Cheers,
|
|
-
|
| How to Generate an API Key
|
|
Your Subscribers
-
|
| How To Create An Email List |
|
An Email List is used to organize and categorize existing contacts and send them personalized information.
You can create different lists to categorize your contacts according to location, behavior, or any other specification that helps you target your audience in a more specific way.
Requirements:
A Sender Profile
|
Create an Email List
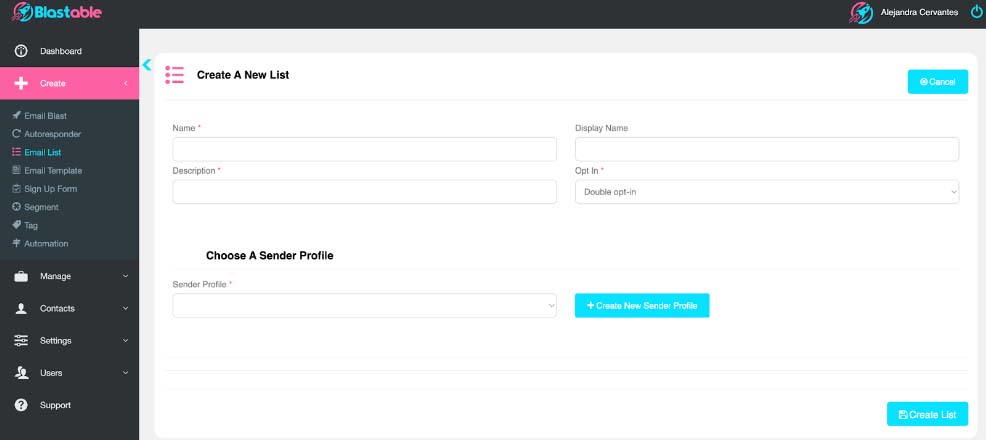
1. From the main menu, click on Create, then click on Email List.
2. In the Create A New List section, complete the following Information:
- Name of your List
- Description
- Display Name
- Opt-in. For more information about Single Opt-in vs Double Opt-in, please visit this link.
3. In the Choose A Sender Profile section, select an existing Sender Profile.
4. If you don’t have any Sender Profile created, click on Create New Sender Profile and complete the required information.
For more information about Creating a Sender Profile, please visit this link.
5. Click on Create List when completing the information.
Congratulations! You've successfully created an Email List.
Manage your Email Lists
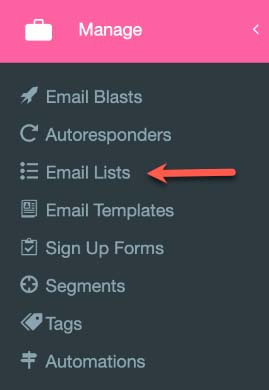
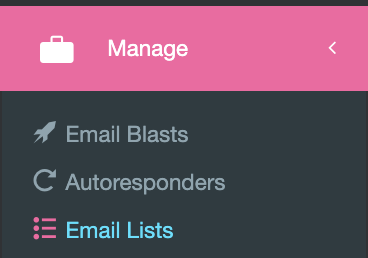
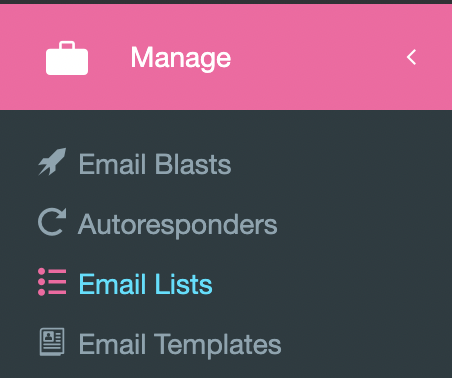
1. To view your Email Lists, click Manage, then click on Email Lists.
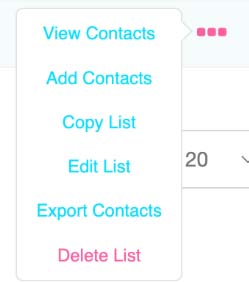
2. Click the three dots on the right hand side to manage and edit your Lists.
If you have any questions or concerns, feel free to reach out to our team!
We're available and ready to help at support@blastable.com or via our live chat widget.
Cheers,
|
|
-
You can add existing contacts into your Blastable account, but keep in mind that your contacts need to meet some requirements.
Here’s How to Import Your Contacts
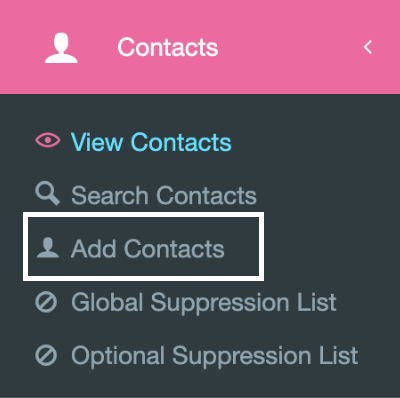
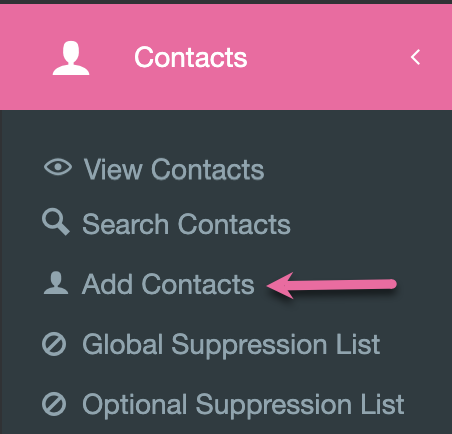
1. On the left hand menu of your Blastable account, click on the “Contacts” tab and then select “Add Contacts”.
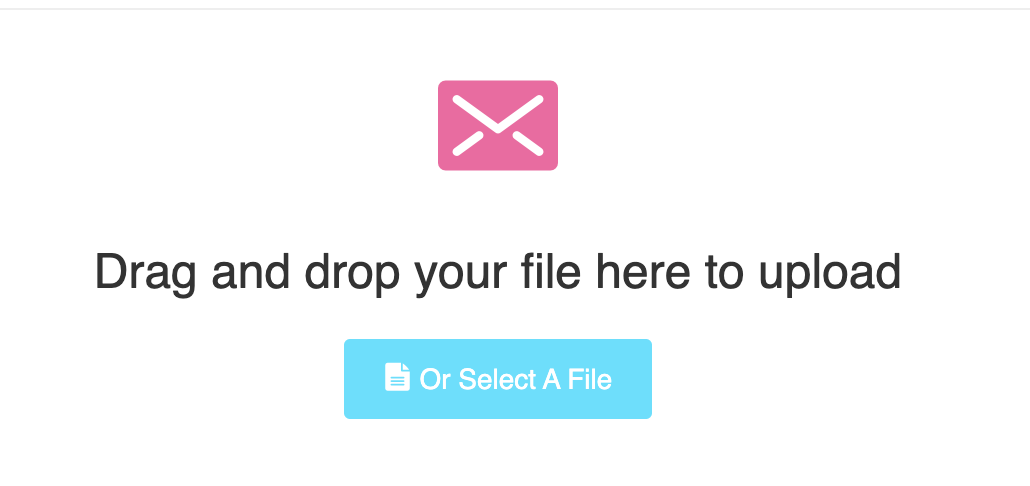
2. From here, you can drag and drop or manually add your CSV file of contacts or individual contacts.

You can also manually add contacts to existing lists.
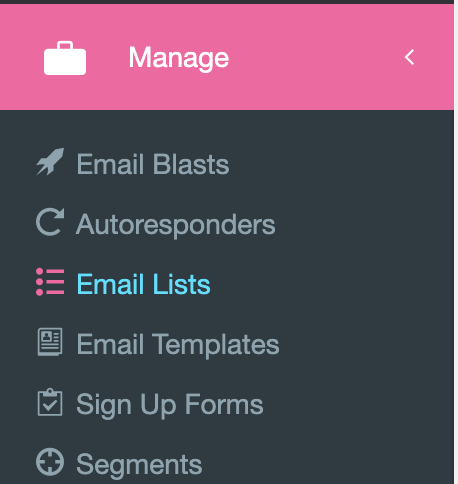
1. Visit the Manage menu, then click on Email Lists.
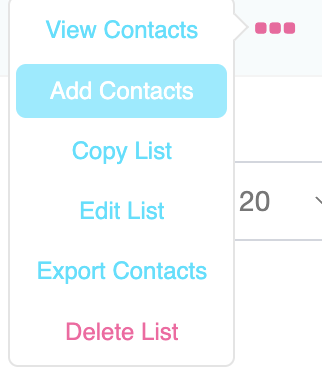
2. Find the list you’d like to add your contacts to, then click the three dots menu on the right side of your existing list. Click Add Contacts.
3. You will find three options to add your contacts: Add a single contact, Copy and paste contacts, and Upload contacts.
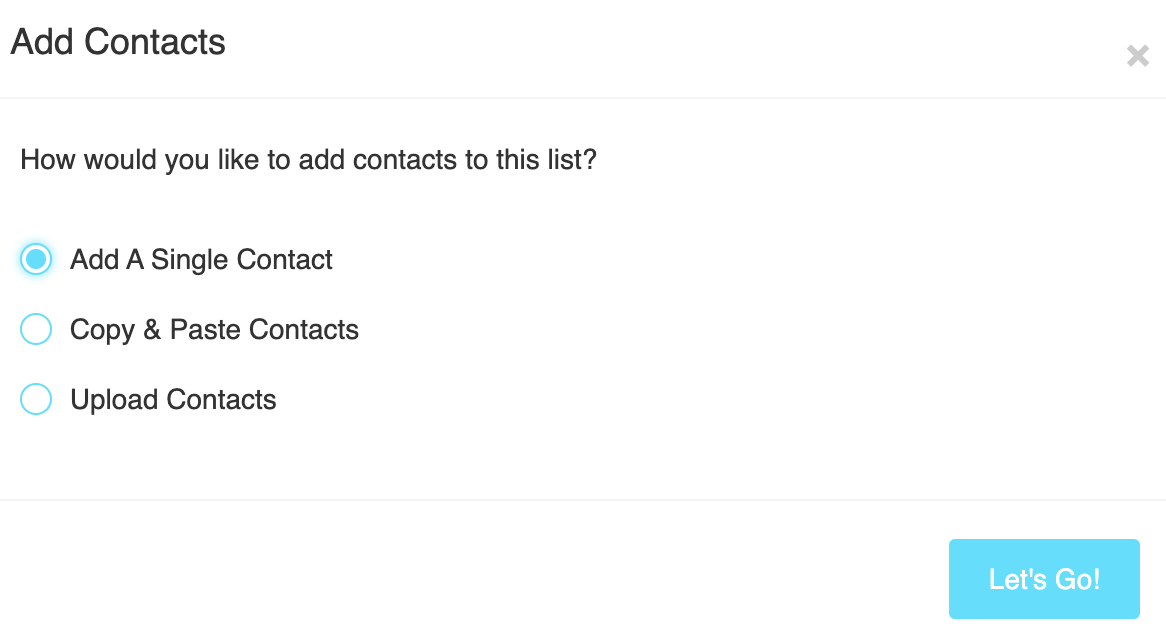
4. Select the desired option and complete the requested information.
Please note that only .CSV files are supported for uploading contacts.
Please note:
We invite new customers to upload up to 1,000 subscribers for their first one or two mailings. Once good engagement is proved, this limit will be raised. As long as there are less than 2% invalid emails, your list of 1,000 people or less will get auto-approved.
When you upload a list of more than 1,000 subscribers, our team needs to validate your list in order to approve it before you can start sending emails. That’s why we suggest bringing in your best subscribers to get optimal results.
List approval usually happens within 24 hours, but often much sooner. If you need a rush approval, just let us know at support@blastable.com
You can check the status of this review by visiting the email lists page from the Manage menu.
Our team will email you once this review has been completed. If for any reason your list gets denied, you will be notified.
Requirements:
Blastable allows you to import subscribers from a file, as long as these subscribers have specifically opted in to receive emails from you. This includes contacts who sign up on a web form, make a purchase, or have opted-in to one of your lists.
These list types are not allowed at Blastable:
- Paid or purchased lists
- Scraped lists
- Safe lists
- Any other list where the user didn’t specifically permit you to email them.
If you have any questions or concerns, feel free to reach out to our team!
We're available and ready to help at support@blastable.com or via our live chat widget.
Cheers,
|
|
-
Your contacts represent your leads. Having a contact list is crucial for marketing, it allows you to reach your target audience and share important information, and discounts, or simply stay in touch with them.
This article will teach you how to add and manage your contacts in your Blastable account.
View Contacts
The View Contacts area shows the following information:

- Email. Shows the contact’s email address.
- Full Name. Shows the contact’s full name.
- Source. It shows where the contact came from. The options are API, Import, and Web Form.
- IP Address. Shows the IP address of the contact. An IP Address indicates general geolocation, usually city or ZIP code.
- Status. It shows the status of the contact. It can be Confirmed, Unconfirmed, Unsubscribed, Unapproved, Bounced, Pending Approval, and Not on any lists.
- Tag. It shows the tags added to that contact.
- Date Added. Shows the exact date when the contact was added/subscribed.
- Last Updated. It shows the exact date the contact was updated.
- Options. Click the three dots to View, Edit, Unsubscribe, or delete your contact.
Search Contacts
You can search your contacts using different criteria. By visiting the Search Contacts area you can filter and find your contacts using the following information:

- You can search for the contacts that belong to a specific list.
- Search your contacts by using their name or last name.
- Search the contacts that are using a specific tag.
- Search your contacts by their status.
- Search the contacts that were added within a specific date range.
Add Contacts
You can manually import contacts by visiting the Add Contacts section.
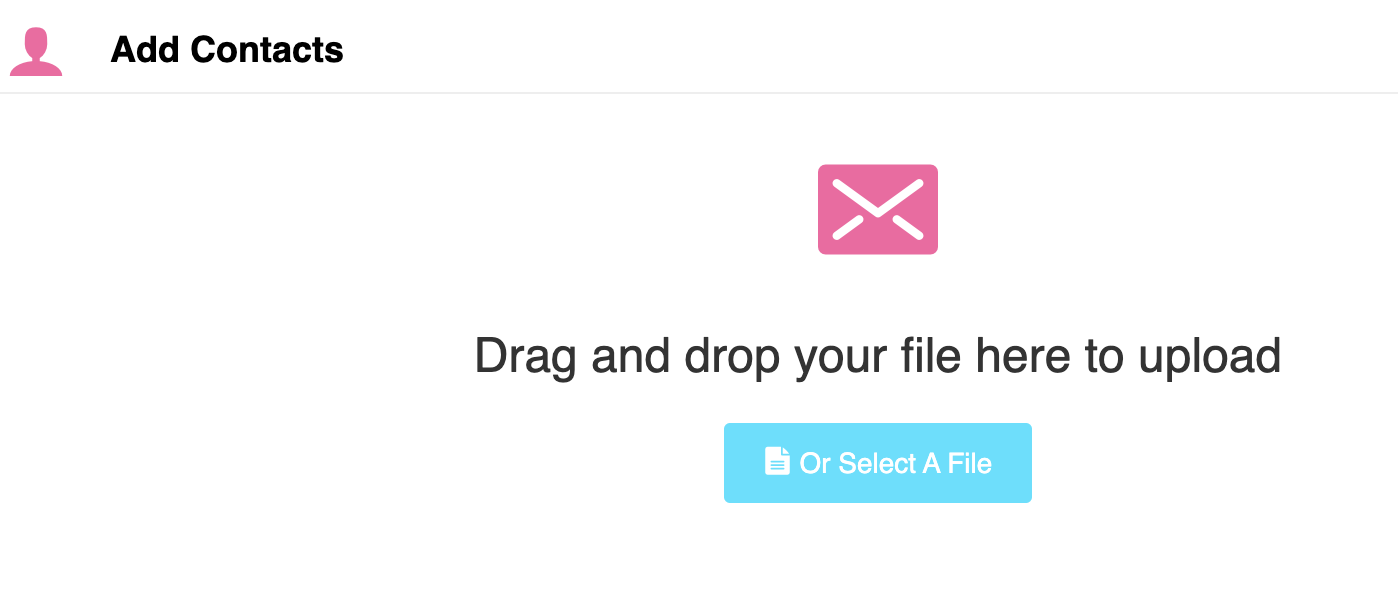
You can drag and drop your file, or manually add it by clicking the blue button.
Please note that only .CSV files are supported for uploading contacts.
When Adding Contacts, we must be aware of some important rules and requirements. To learn more about this topic, please visit this article.
Global Suppression List
A Suppression List is a list of contacts that will be blocked from receiving your emails from your Blastable account.
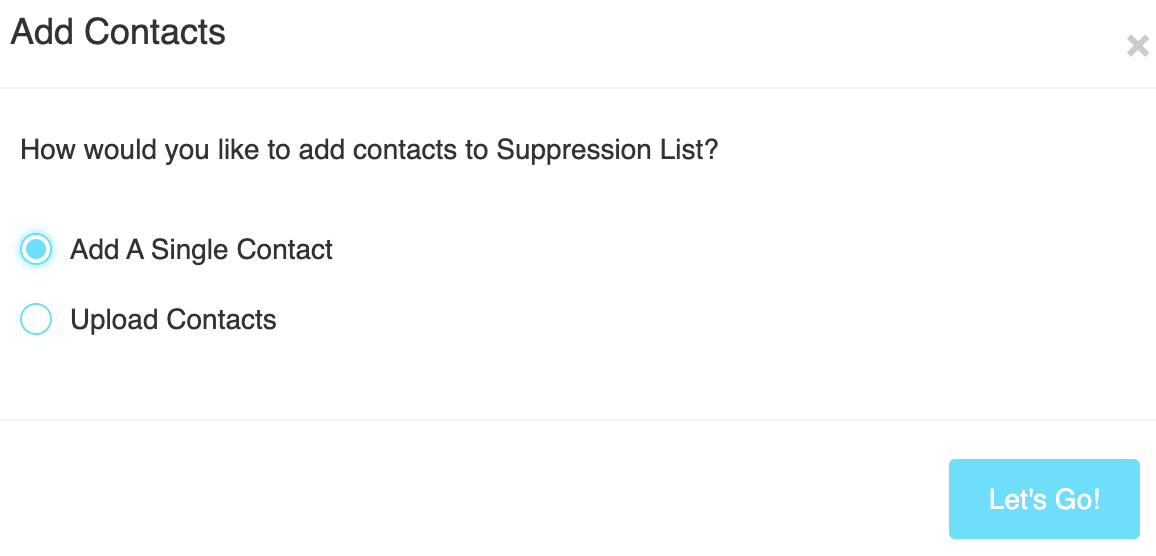
1. Add specific contacts to a Suppression List by clicking on Add Contacts.

2. Select if you will add a single contact or more than one and click on Let’s Go.
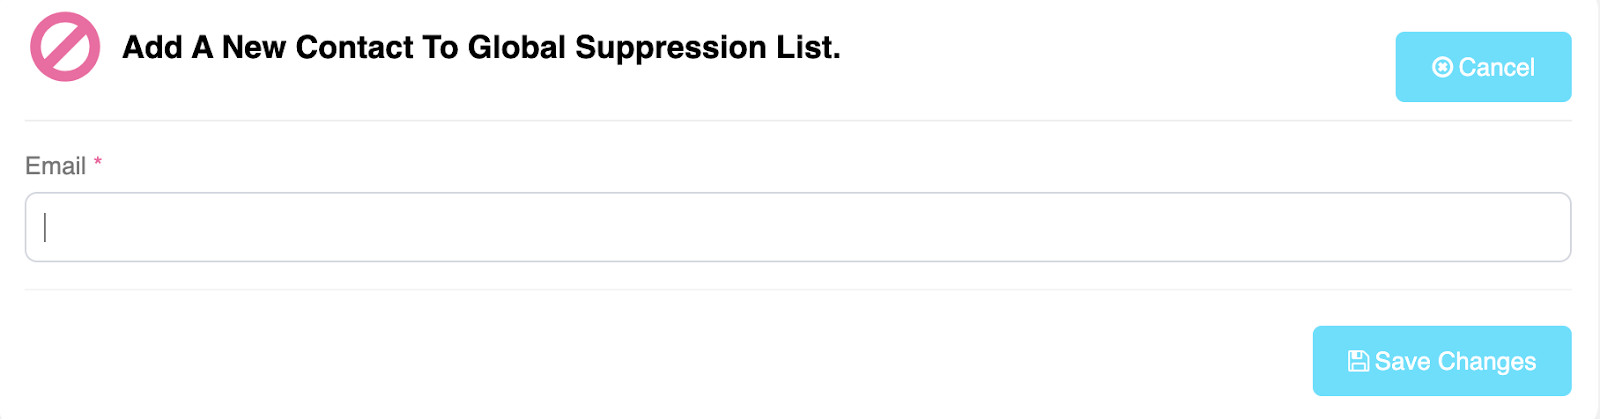
3. For Single Contacts, add the contact’s email address and click on Save Changes.
4. For more than one contact, drag and drop, or upload the file that contains your contact’s email address. Click on Upload.
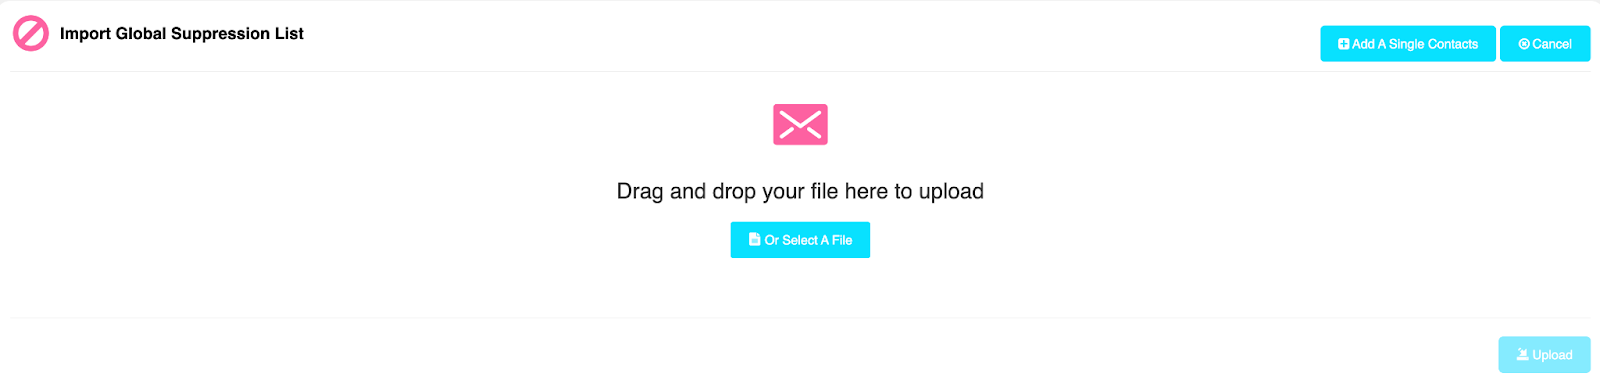
Please note that only .CSV files are supported for uploading contacts.
Optional Suppression List
You can create your suppression lists where you can import email addresses that will never receive emails from you.
You can select these lists and use them in various places, such as when sending a campaign.
1.
Click on Create New to create your suppression list.
2.
Add a Name to your list. Optionally you can select an existing list.
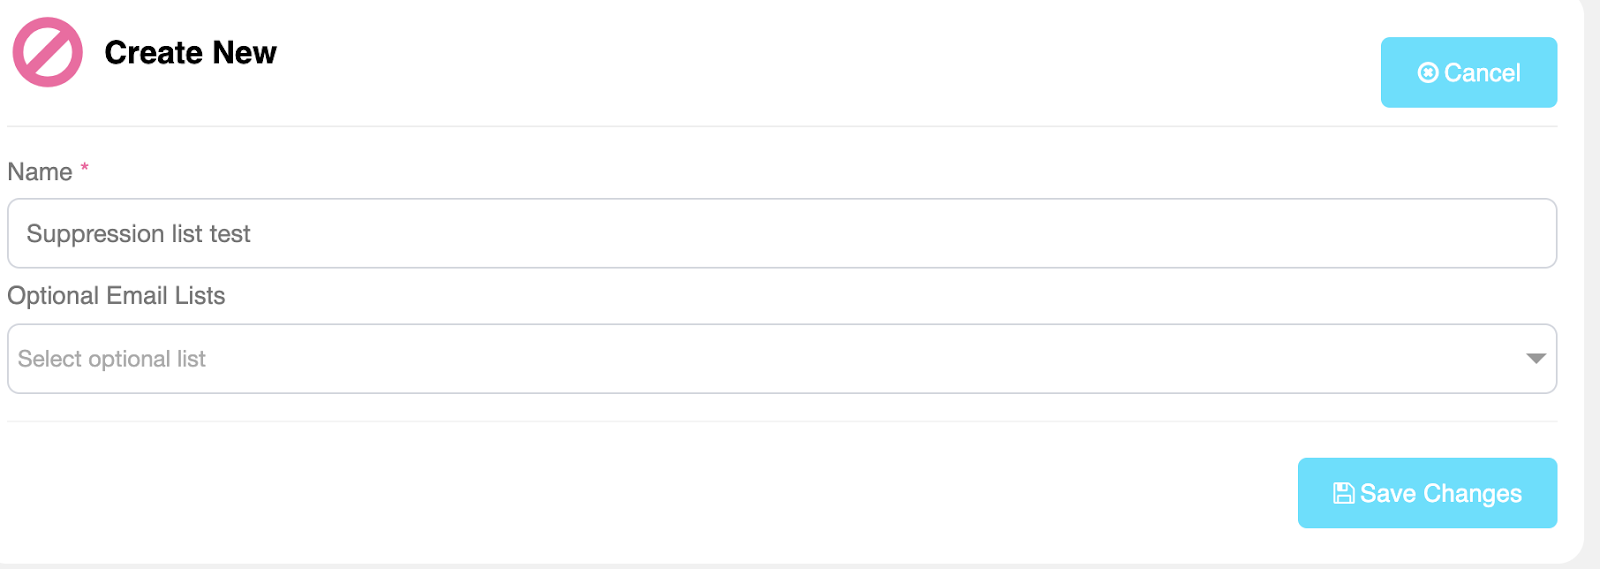
3. Click on Save Changes when finished
Congratulations! Now you know how to add and manage your contacts!
If you have any questions or concerns, feel free to reach out to our team!
We're available and ready to help at support@blastable.com or via our live chat widget.
Cheers,
|
|
Sending Emails
-
|
| How To Create An Email Blast |
|
An Email Blast is a sequence of emails that will be sent out to your contacts to share new information, discounts, new products, etc.
Sending email blasts will help you improve your communication and relationship with your subscribers and customers.
Requirements:
At least one Email List or Segment created
|
Create an Email Blast
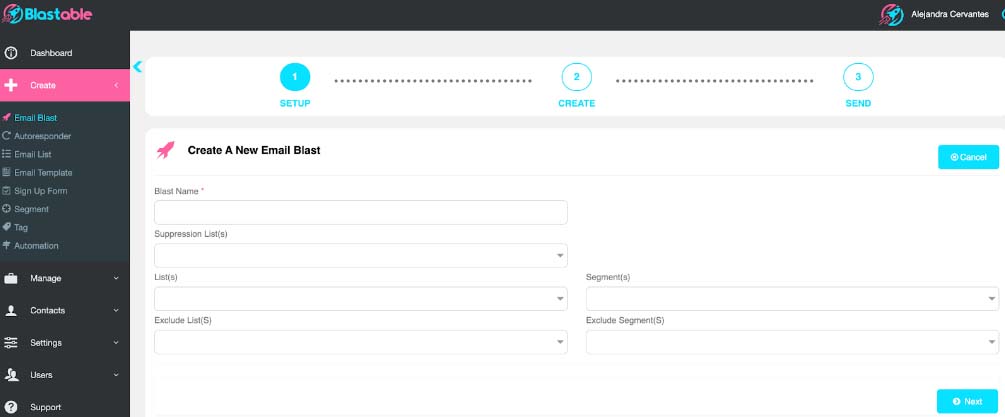
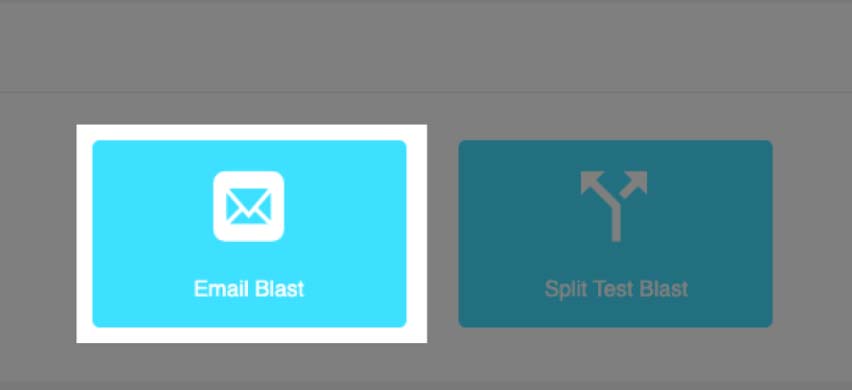
1. From the main menu, click on Create, then click on Email Blast.
2.Select Email Blast as your Blast Type.
3. Complete the following information:
- Blast Name
- Suppression Lists
- Lists
- Exclude Lists
- Segments
- Exclude Segments
4. Click on Next to move forward to the Blast Editor.
Add Content to your Blast
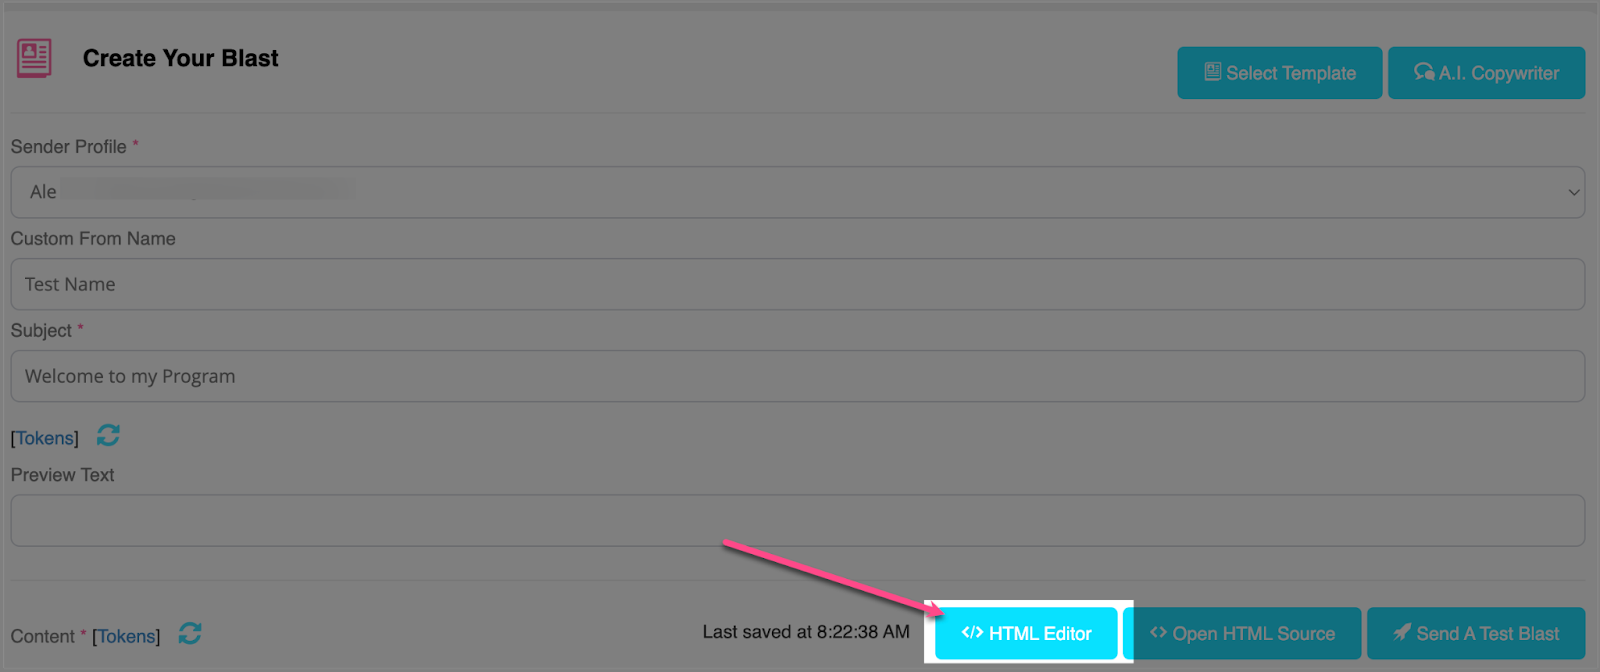
You will be taken to the Blast Editor, where you can edit the content of your blast (email).
1. Edit the Sender area:
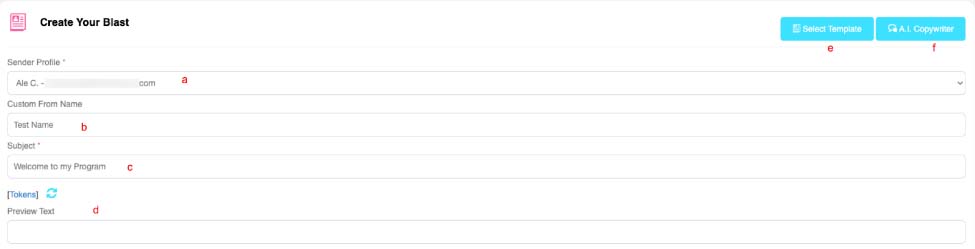
- Sender Profile
- Custom From name
- Subject
- Optionally, you can use Tokens to make your emails more personalized. To learn more about Tokens, please visit this link.
- You can use premade templates from here.
- You can use an AI tool to improve the content of your emails.
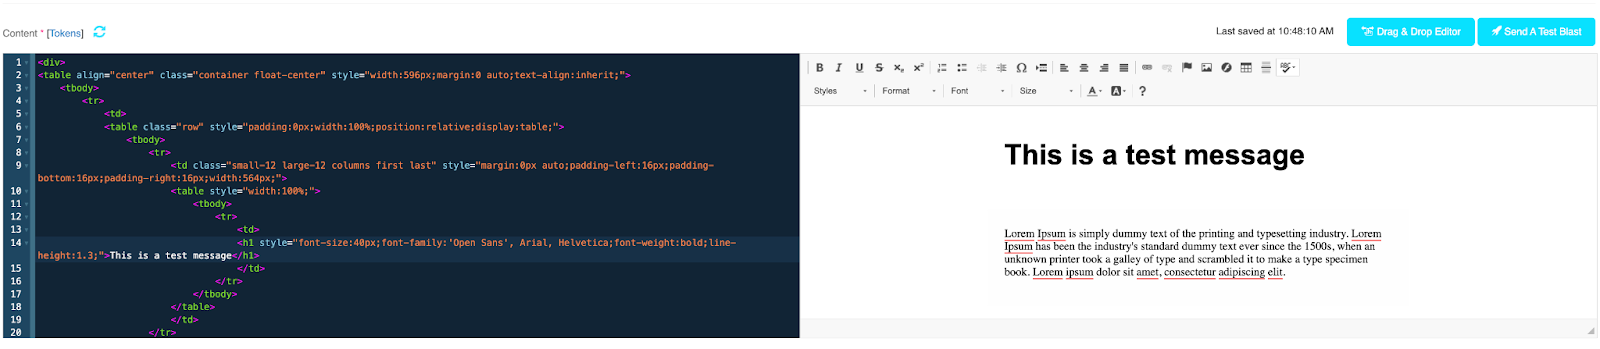
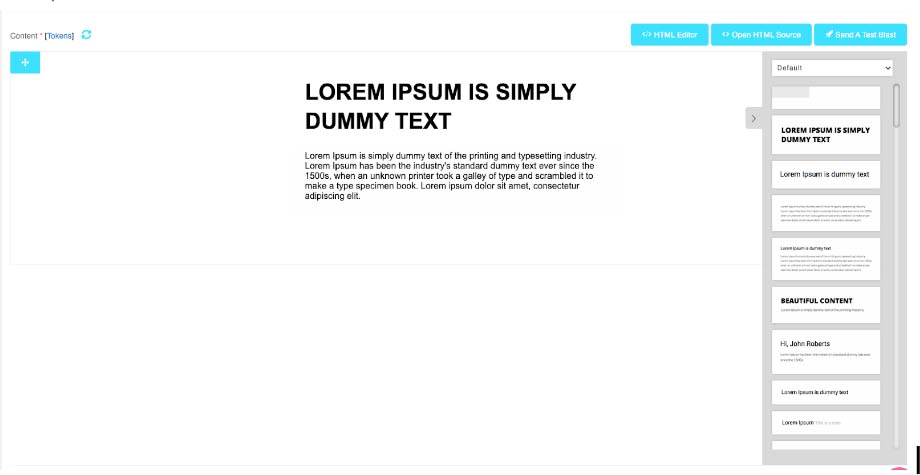
2. Start working on the content of your email by using our editor. HTML code is accepted in this area.
3. To complete your blast, please select the following options:

- Select weather to remove or show all hidden CSS formatting.
- Select if you want to show only Plain text.
- Select if you want your customers to unsubscribe by clicking.
- Select if you want to use Auto Plain Text.
- Use these buttons if you want to preview, save or go to the next step of the process.
Schedule or Send your Blast
The next step in the process will be either to schedule your blast for a future date or send it immediately.
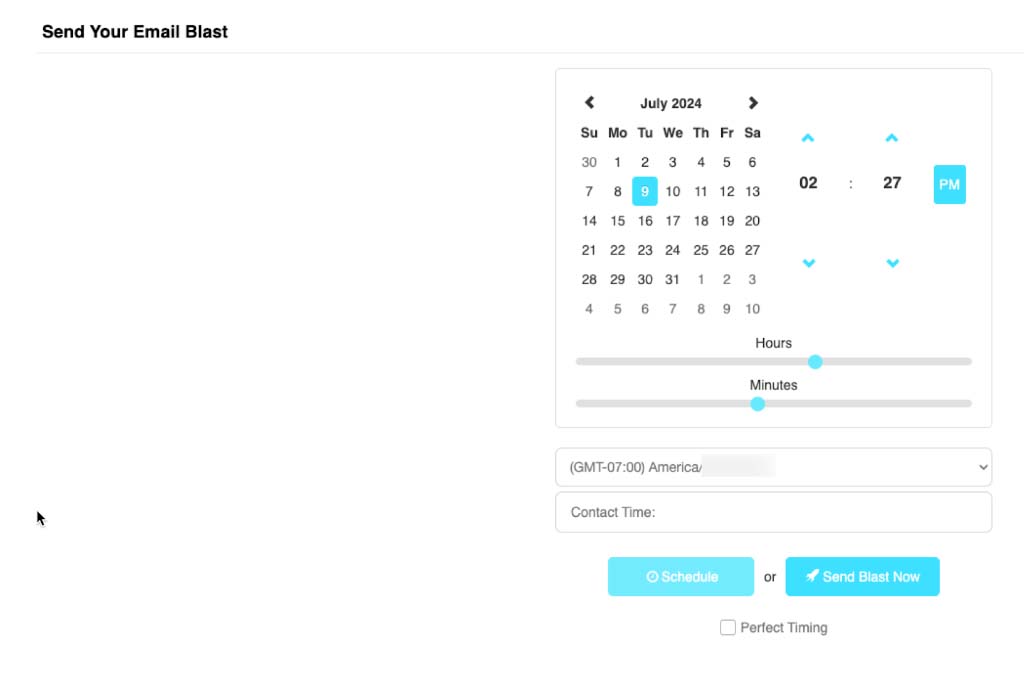
- To schedule your email, select a future date and time and then click on Schedule.
- To Send it immediately, click on Send Blast Now.
- Check the Perfect Timing box to send the email at the time your contacts are most likely to open them in a period of 24 hours.
- Once a Blast is sent, you will be able to see their performance in the Manage section:
Congratulations! You've successfully created an Email Blast.
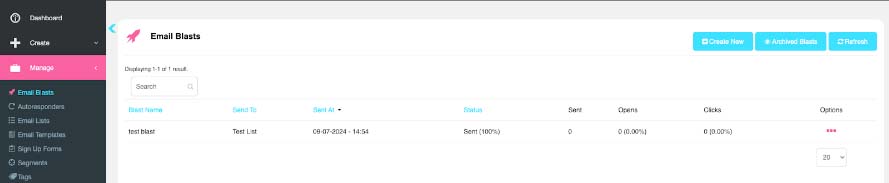
Manage your Email Blasts
1. To view your Email Blasts, click Manage, then click on Email Blasts.
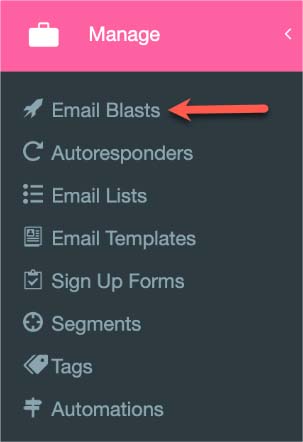
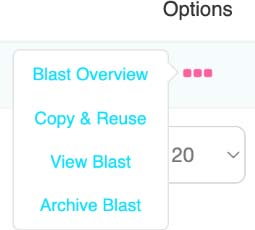
2. Click the three dots on the right-hand side to manage and edit your Email Blasts.
If you have any questions or concerns, feel free to reach out to our team!
We're available and ready to help at support@blastable.com or via our live chat widget.
Cheers,
|
|
-
|
Testing is an essential step when creating marketing emails. You need to ensure that your text and images are displayed appropriately.
The best way to test is to send a test email to your address; that way, you can fix any grammar or format errors before sending it to your audience.
Requirements:
A blast created
|
Sending a Test Blast
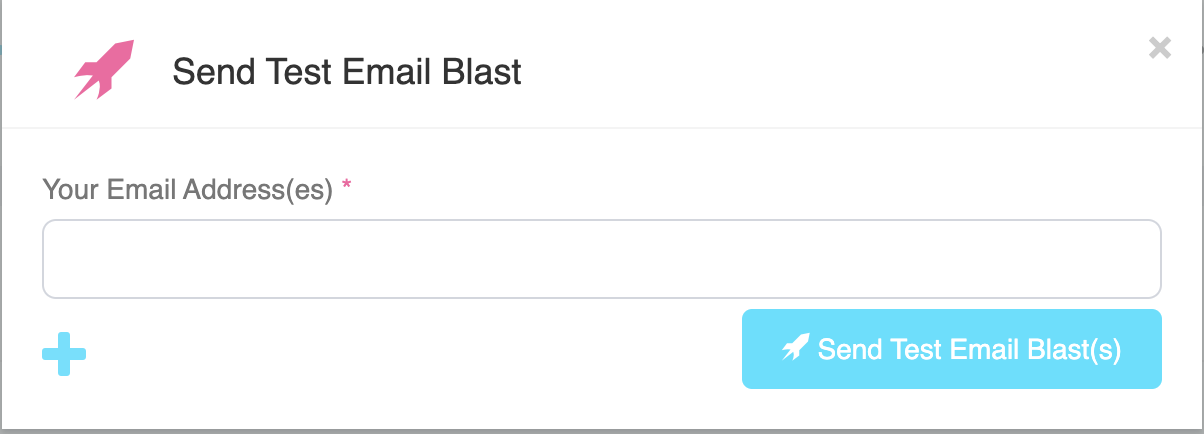
1. Once you have finished your Blast, you can send a copy by clicking the Send A Test Blast button.
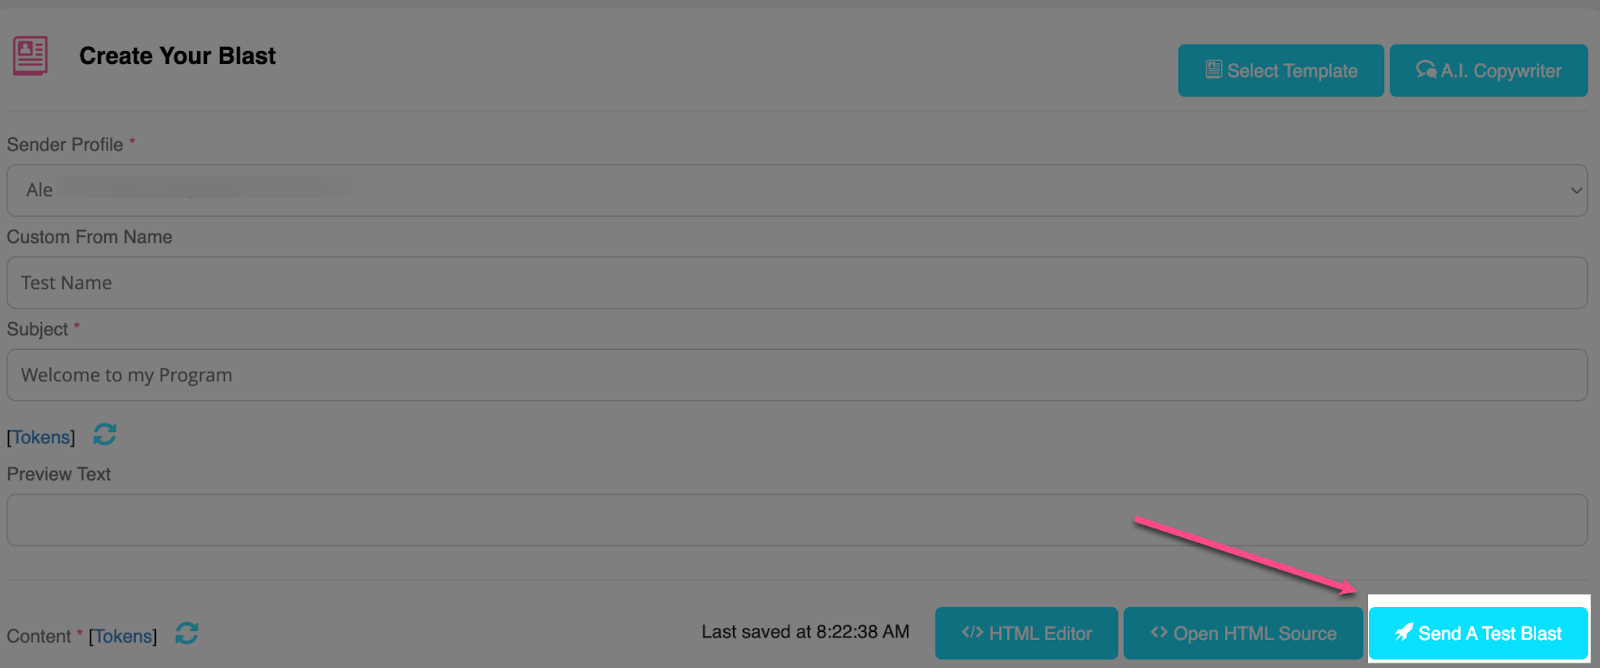
2. Type your email address and click on Send Test Email Blast.
3. If you want to send it to multiple email addresses, click the “+” icon to add additional fields.
If you have any questions or concerns, feel free to reach out to our team!
We're available and ready to help at support@blastable.com or via our live chat widget.
Cheers,
|
|
-
|
| How to Use Our HTML Editor |
|
-
|
| How To Create An Email Template |
|
Improve the quality of your emails by using templates. Email templates ensure that all your emails keep a consistent style and tone, which will help you maintain a professional image.
How to Create an Email Template
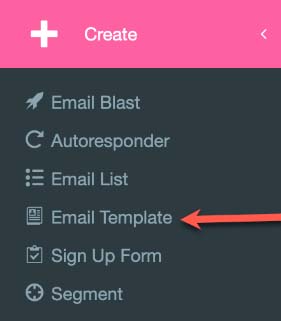
1. From the main menu, click on Create, then click on Email Template.
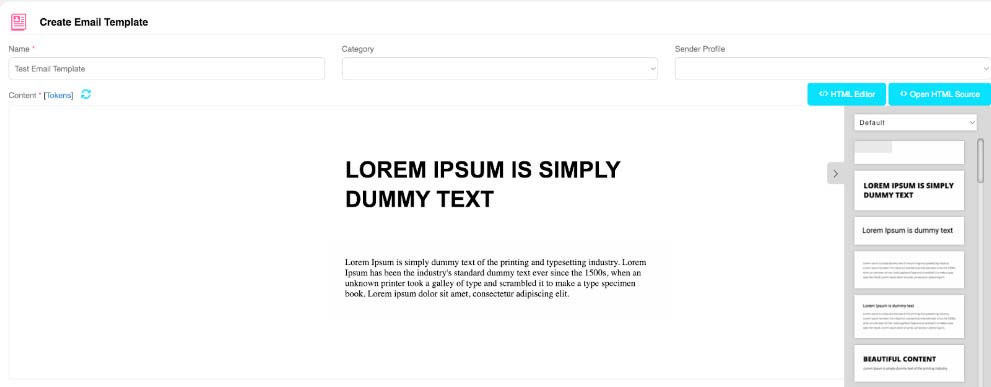
2. Add a Name for your template, and optionally, add a Category and a Sender.

3. On the right side of the editor, you will find a tab with a drop-down menu.
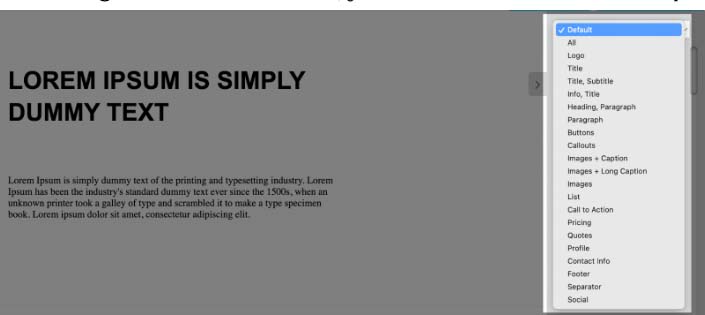
4. Select the type of template you are looking for. For example, if you want to add an image with a text you can choose the Image + Caption or Image + Long Caption blocks.
5. Once you select the block, drag and drop it into the editor. For this example, I added the Image + Caption block.
6. Hover your mouse over the image. Click the link icon to add an image’s link or the camera icon to select an image from your computer.

7. To edit the text, just click on the existing text and start editing as you wish.
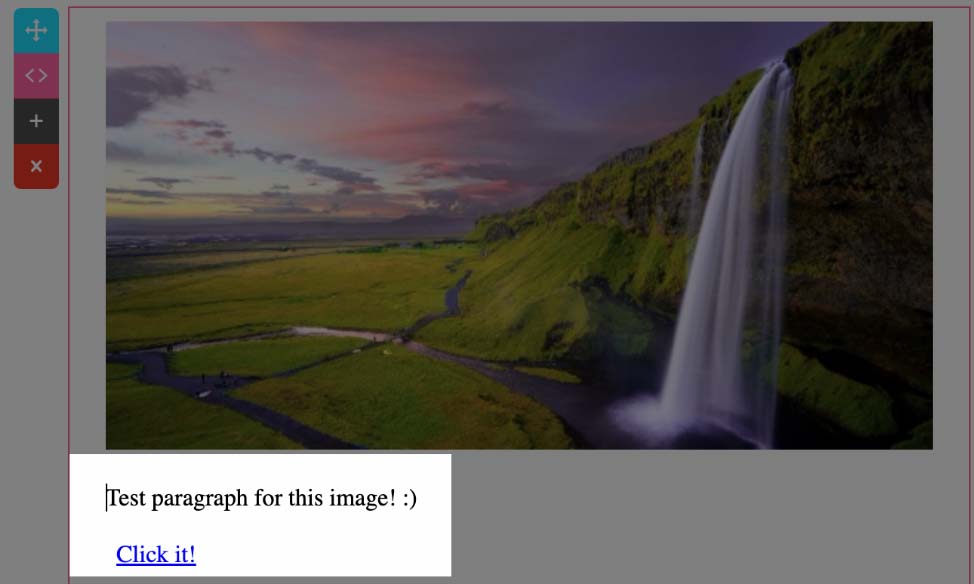
8. Manage your block using the controls on the left side.
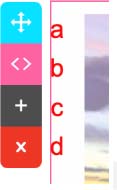
- Drag and drop the image.
- Open the HTML code tab to edit.
- Duplicate the block.
- Delete the block.
Important Note: If you prefer using HTML code, remember you can add or edit it anytime by using the HTML editor.

Tokens
Tokens are tags used to personalize your emails using your contact information, your company’s name, and current date, among other data.
When adding a token, this tag will be updated with the information available in your account. For example, if you add the token [fname] it will automatically update using your customer’s first name.
1. To access the tokens available, click on Tokens, under your template’s name.
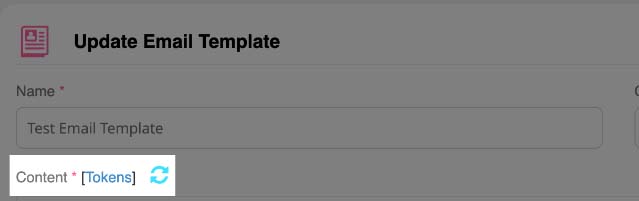
2. A new tab will display the tokens you can use. Click on Add.

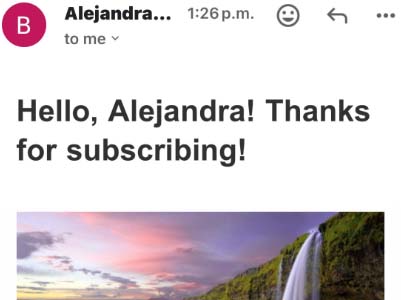
3. This is an example of how a token will look in your email template.

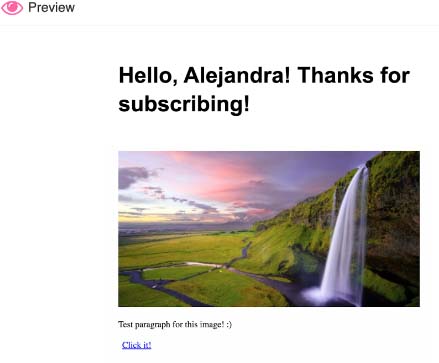
4. This is how the final version of the email looks.
Send a Test Email
If you have doubts about the final look of your emails, you can always preview it, or send a test email to ensure it looks the way you want.
At the top right side of the page, you will find these buttons:
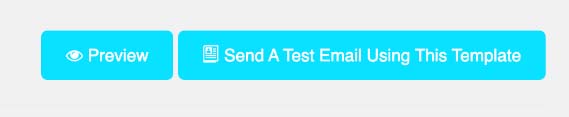
- The Preview button will display your email in a new tab:
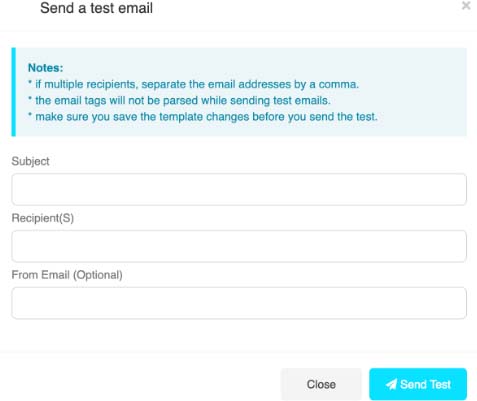
- The Send a Test Email Using This Template button gives you the option to send the email to more than one recipient. (Make sure to follow the instructions at the top of the tab.)
Manage your Email Templates
1. To view your Email Templates, click on Manage, then Email Templates.
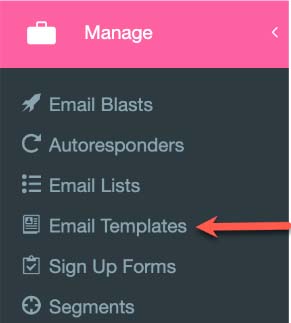
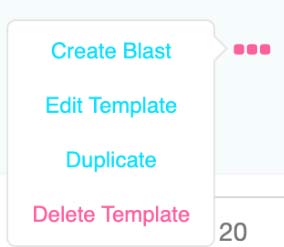
2. Click the three dots on the right-hand side to manage and edit your Email Template.
If you have any questions or concerns, feel free to reach out to our team!
We're available and ready to help at support@blastable.com or via our live chat widget.
Cheers,
|
|
-
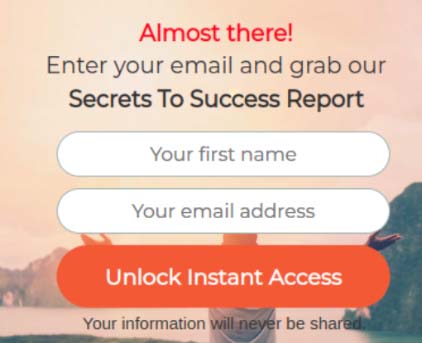
A Sign-Up Form, (also called an Opt-In form) is a web page or pop-up where users enter the information required to access that website's services. That information will be collected and stored by the website’s owner.
Most signup forms require a name and an email address, but you can always ask for further information if needed.
How to Create a Sign-Up Form
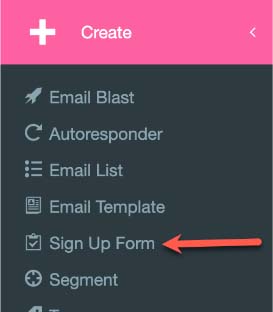
1. From the main menu, click on Create, then click on Sign Up Form.
2. Choose an existing predefined form.

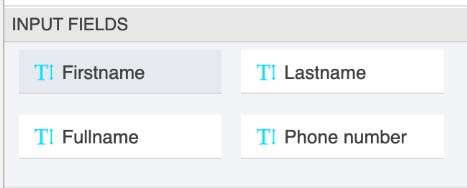
3. Add additional Input Fields if needed.
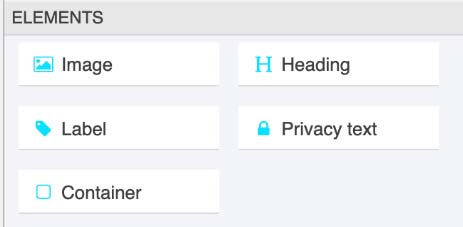
4. You can also add and manage additional elements.
5. To Style an element, click on it and edit it until you reach the desired result.
For example:
By clicking on this headline:
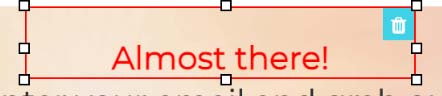
You will be able to edit the text, font, and other features.

6. When finish editing your Sign-Up Form, click on Next.

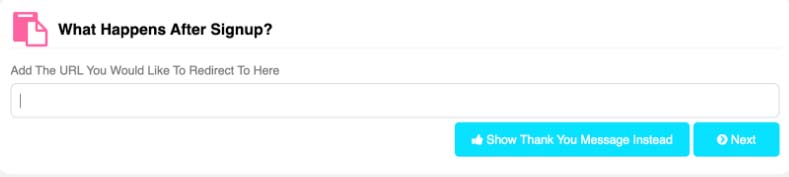
What Happens After Sign-up?
1. Once your visitors sign up to your form, you can choose to redirect them to a particular URL, or just to show them a Thank you Message.
2. The next step is to add the following information:
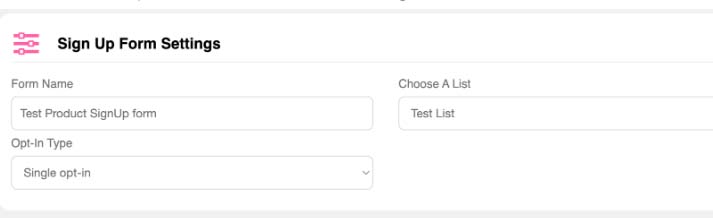
- Add a Name to identify your sign-up form.
- Select a List to send the contacts who subscribe to this form.
- Choose the Opt-In Type for this form.
Important Note: Single Optin means the subscriber only needs to enter their email once to start receiving emails.
Double Opt-In means the user must subscribe and then confirm their email through another link.
3. Click on Publish when finish editing your Sign-Up form.
Manage your Sign-Up Forms
1. To view your Sign Up Forms, click on Manage, then Sign Up Forms.
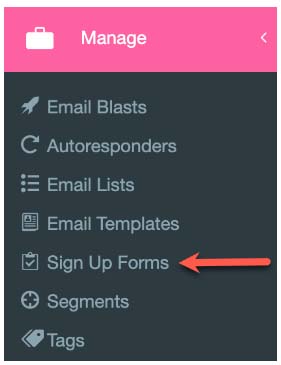
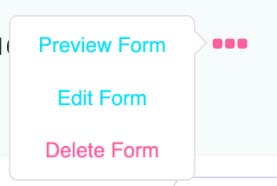
2. Click the three dots on the right-hand side to manage and edit your Sign-up Forms.
Congratulations! Now you know how to create and manage sign-up forms!
If you have any questions or concerns, feel free to reach out to our team!
We're available and ready to help at support@blastable.com or via our live chat widget.
Cheers,
|
|
-
|
| How To Set Up An Autoresponder |
|
An autoresponder is used to send an automated email to your contacts after they subscribe to one of your lists.
An autoresponder can be configured in two different ways:
- Immediate Autoresponder. This is an automated email that will be sent to your subscribers as soon as they subscribe.
- Timed Autoresponder. You can use this option to send check-in messages at specific dates and times.
Requirements:
- An Email List
- A Sender Profile
|
Create an Autoresponder
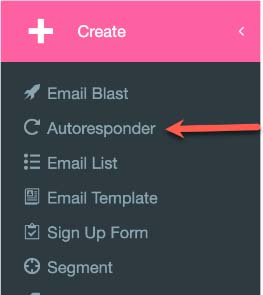
1. From the main menu, click on Create, then click on Autoresponder.
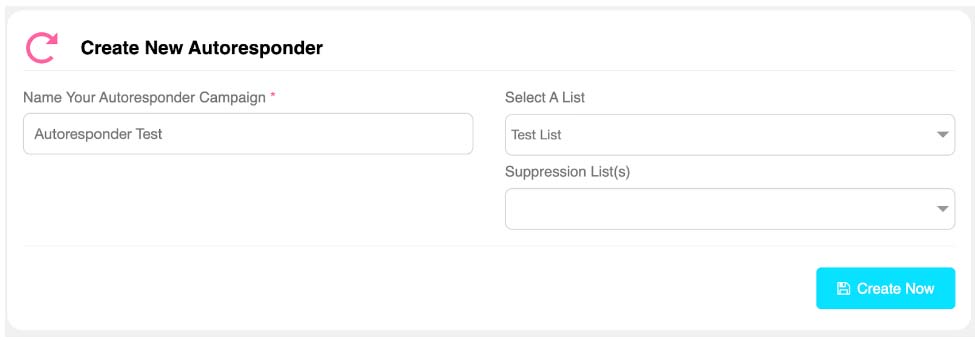
2. Add a Name for your autoresponder, select a list, and optionally a Suppression list.
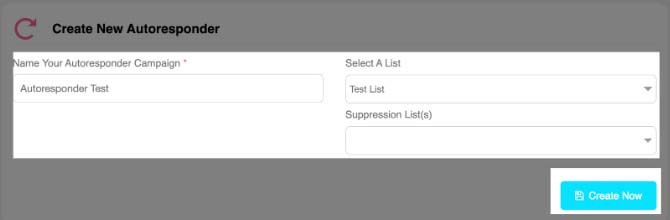
3. Click on Create Now.
4. A new button will appear, click on Add Autoresponder Messages.

5. If you want to send an Immediate Autoresponder, add a Name for it, select the Trigger After Subscribing, and click on Next.
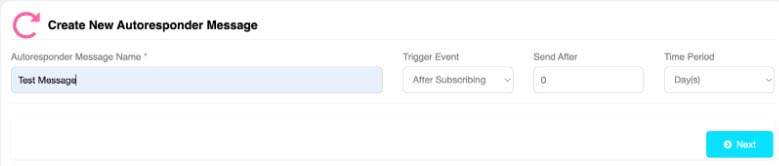
6. If you want to send a Timed Autoresponder, choose Email Open or Email Click for the Trigger Event.

7. Then select the number of days, hours, or minutes that you want to delay the email sending and click on Next.
Create an Autoresponder Message
Once the Autoresponder is created, you will be sent to the Email editor to start creating your Email Message.
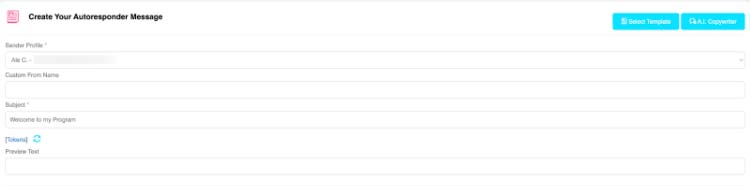
1. Complete the sender information of your Autoresponder Message. You can use tokens for the subject.
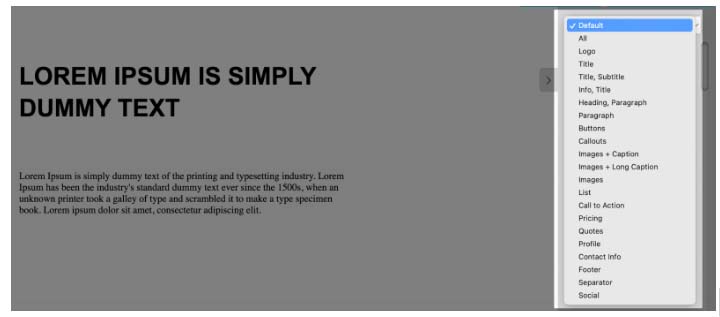
2. Start building your email by dragging the different blocks from the right side of the screen. For this example, I added the Image + Caption block.
3. Hover your mouse over the image. Click the link icon to add an image’s link or the camera icon to select an image from your computer.
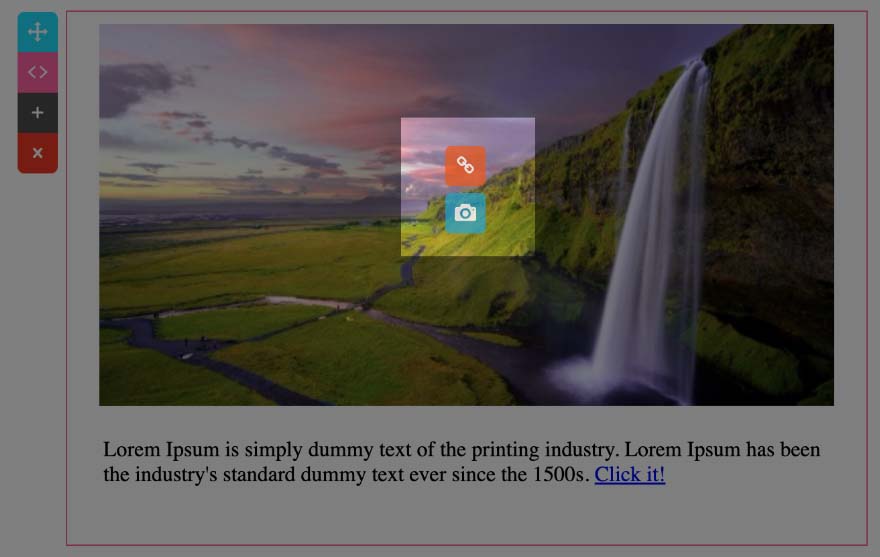
4. To edit the text, just click on the existing text and start editing as you wish.

5. Manage your block using the controls on the left side.
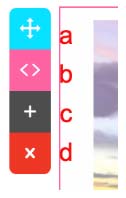
- Drag and drop the image.
- Open the HTML code tab to edit.
- Duplicate the block.
- Delete the block.
Important Note: If you prefer using HTML code, remember you can add or edit it anytime by using the HTML editor.

6. Select if you would like to send your email in plain text only, using these options at the bottom of the page.

7. Use these buttons if you like to Go Back to the previous page, Preview your email, Save the changes, or if you are done, click on Next.

8. Use the drop-down menu to Include current subscribers to receive this email, and select Send when Opening this Campaign.
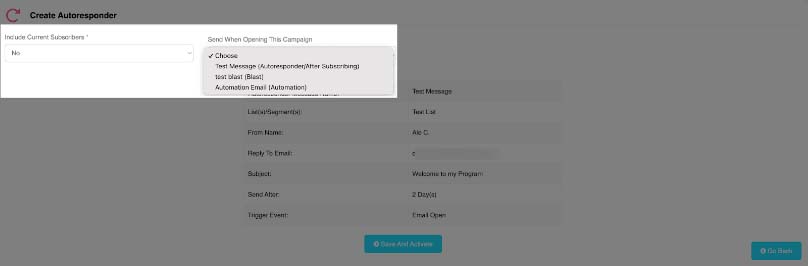
9. Click on Save and Activate when finished.
Manage your Autoresponder
1. To view your Autoresponder, click on Manage, then Autoresponder.
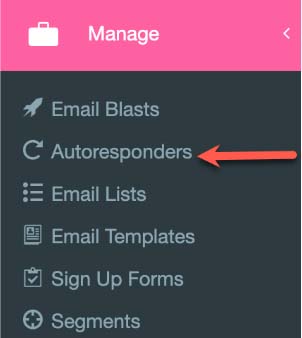
2. Click the three dots on the right-hand side to manage and edit your Autoresponders
If you have any questions or concerns, feel free to reach out to our team!
We're available and ready to help at support@blastable.com or via our live chat widget.
Cheers,
|
|
-
|
| How To Create An Automation |
|
An Automation is a sequence of automated steps that will be triggered by a specific action from the customer.
You can create Automations for different scenarios, for example, sending an automated email one hour after a customer subscribes to one of your lists.
How to Create an Automation
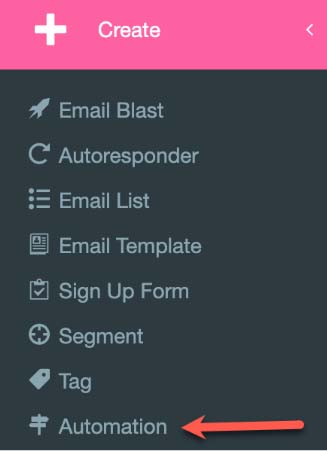
1. From the main menu, click on Create, then Automation.
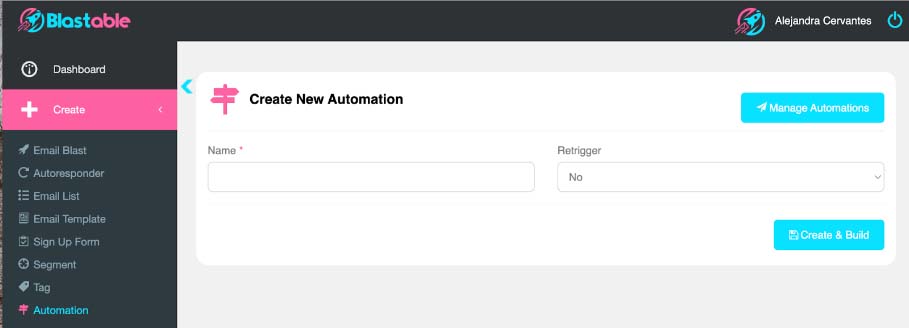
2. Click on Create New.

3. Add a Name for your automation.
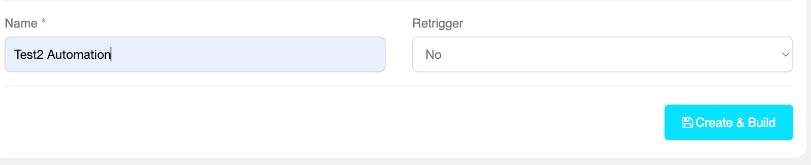
4. Select whether to retrigger the automation or not.
5. Click on Create & Build.
Build your Automation
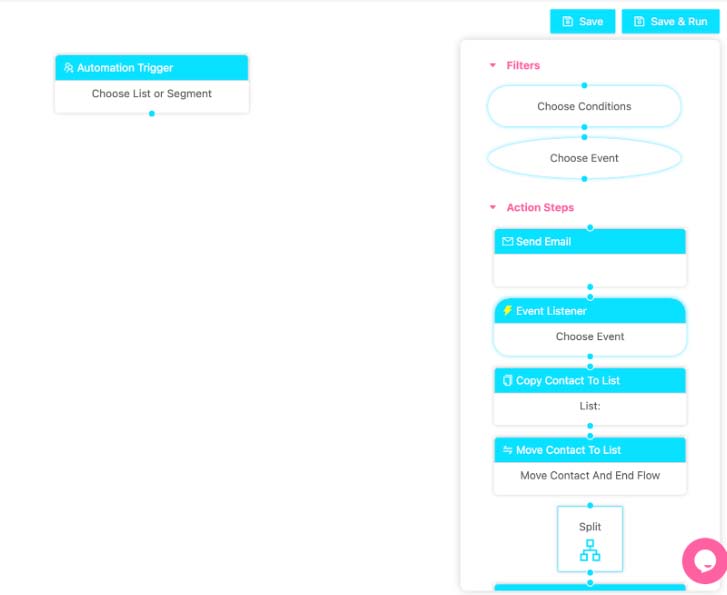
Once you have created your Automation, you will be taken to the Automation Builder page.
Here, you will find different triggers and action steps you can use to build your Automation flow by simply dragging and dropping them into the builder and double-clicking on them to edit.
For specific steps on how to start building your automation, please visit this article.
Manage your Automations
1. To view your Automations, click Manage, then click on Automations.

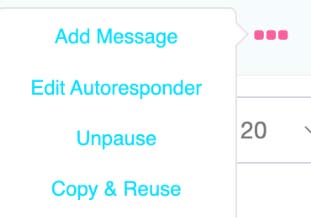
2. Click the three dots on the right hand side to manage and edit your Automations.

If you have any questions or concerns, feel free to reach out to our team!
We're available and ready to help at support@blastable.com or via our live chat widget.
Cheers,
|
|
-
|
| How To Build Your Automation |
|
Once you have created your Automation, you will be taken to the Automation Builder page.
Here, you will find different triggers and action steps you can use to build your Automation flow by simply dragging and dropping them into the builder and double-clicking on them to edit.
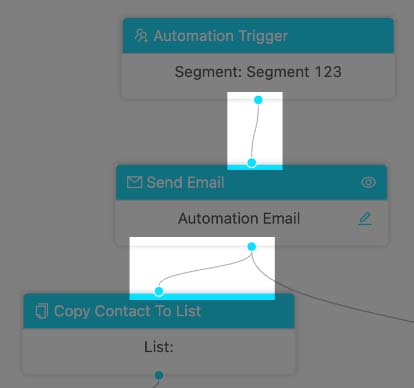
Important Note: Please remember to match your steps by connecting the dots between steps. Example:
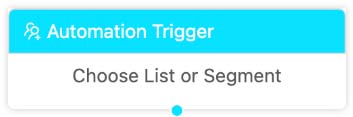
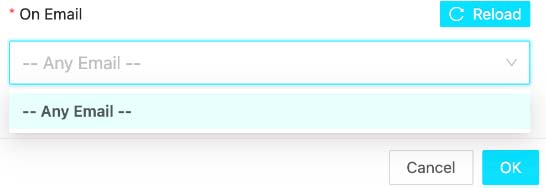
Select a Trigger List or Segment
1. Double-click on the Automation trigger, to select a list or segment for this automation.
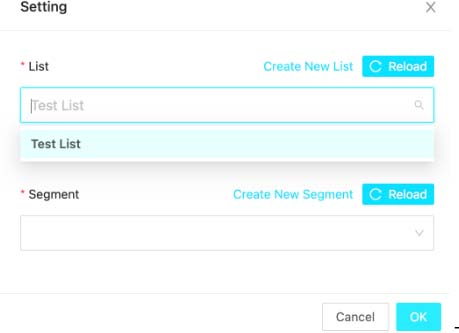
2. Select your list or segment and click on Ok. This means that this automation will only run for the contacts in this list/segment.
Filters
Drag and drop the filter of your choice:

Choose Conditions
1. Double-click to add conditionals to this automation.
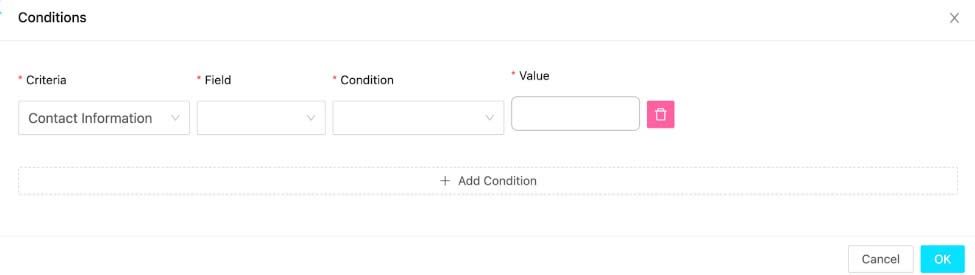
2. These are the available options for the criteria.
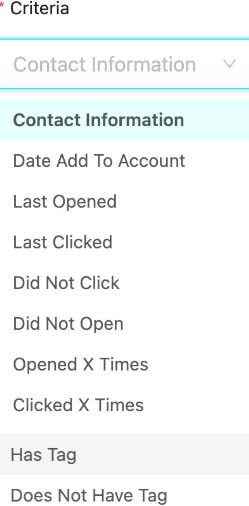
3. Depending on the criteria selected, you’ll need to complete additional fields.
Examples:
a. Contact Information

b. Last Opened

4. Once you have created your Conditions, click on OK.
Choose Events
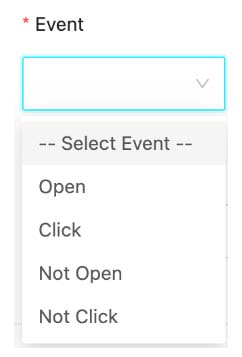
1. Double-click to select a trigger event for this automation.
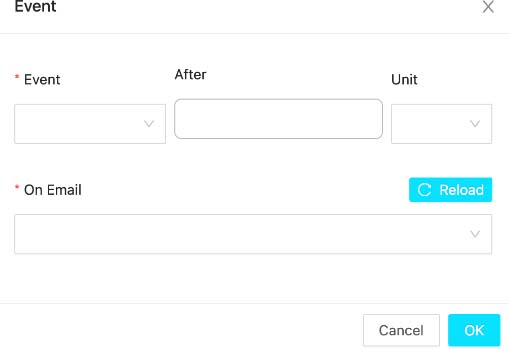
2. Select an Event from the drop-down menu. These are the options available.
3. Select the unit and the amount of time to wait after the event happens.

4. Select the specific email you want to use for this event and click on OK.
Action Steps
Drag and drop the Action Step of your choice:
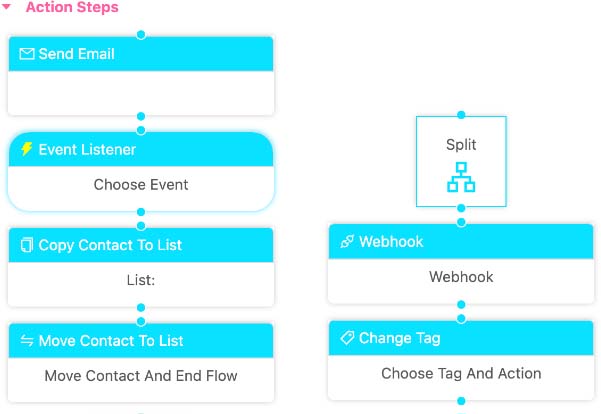
Send Email
1. Double-click on the Send Email action step to visit the Email editor and start building your email.
For more information on how to create an email blast, please visit this article.
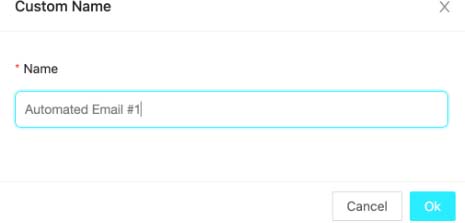
2. You can customize the name of your email by clicking the pencil icon.

3. Add a name for your email and click OK.
Event Listener
1. Double-click on the Event Listener action step to select an event.
2. The available events are:
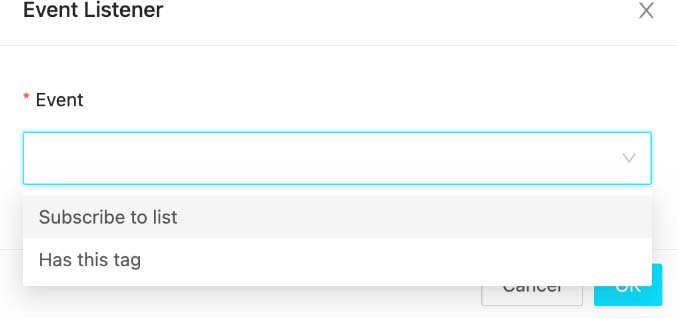
3. Choose a list or a tag according to the selected event and click OK.
Copy Contacts to List
1. Double-click on the Copy Contacts to List action step to select a list.
2. You can either create a New List or choose an existing one to copy your contacts to.
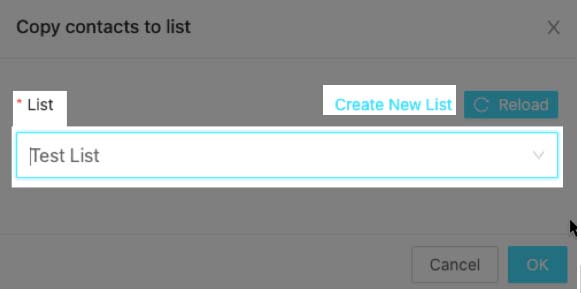
3. Click on Ok when finished.
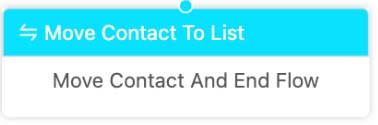
Move Contacts to List
1.
Double-click on the Move Contacts to List action step to select a list.
2.
You can either create a New List or choose an existing one to move your contact to.
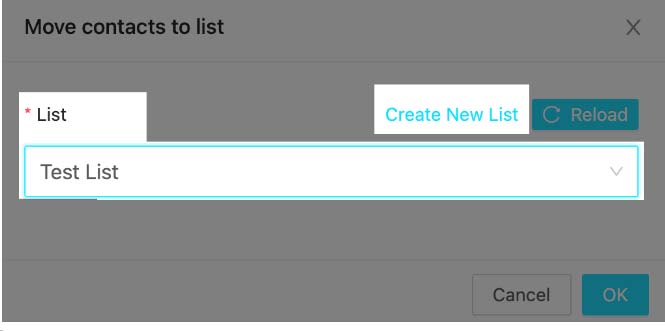
3. Click on OK when finished.
Please note that the Automation will be ended after this step as it is shown here:
Split
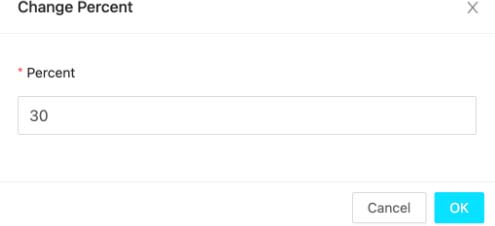
1. Drag and drop the Split step to split your Automation flow.
2. Add the following step for the Split step and click on the gear icon to set a percentage.
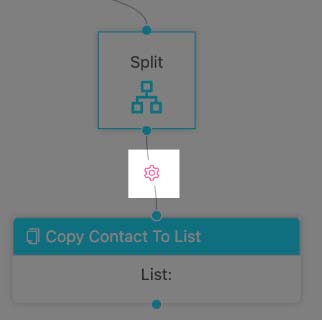
3. Select the desired percentage and click OK.
Webhook
1. Double-click on the Webhook action step to add your Webhook information.
2. Add the Webhook’s URL and the desired format.
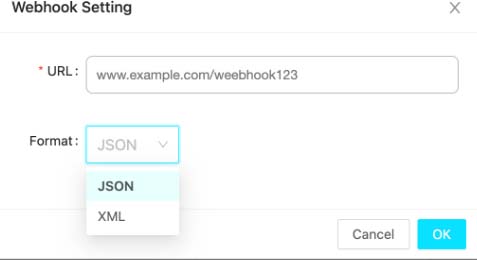
3. Click on OK when finished.
Change Tag
1. Double-click on the Change action step to add your Tag information.
2. You can either create a new tag or choose an existing one.
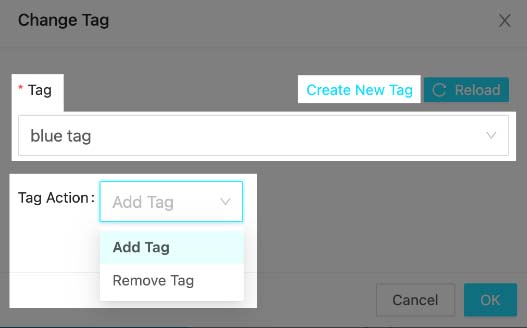
3. Select the Tag action, to add or remove, and click on OK when finished.
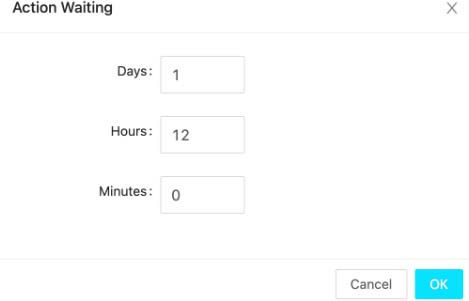
Wait
1. Drag and drop this step to add a delay in your Automation flow.
2. Select the amount of days, hours, and minutes you want to delay the following steps.
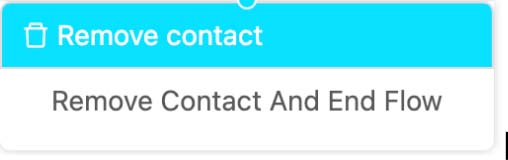
End
The Remove Contact step will be the last step of your Automation. This step will remove the contact from the flow and end the Automation flow.
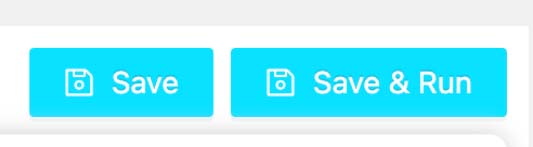
Save your Automation
Once you finish your Automation, you have the option to just save it, or Save and start running it immediately.
If you have any questions or concerns, feel free to reach out to our team!
We're available and ready to help at support@blastable.com or via our live chat widget.
Cheers,
|
|
|
|
-
|
| Key Differences: Email Blast, Autoresponder, and Automation |
|
|
Email marketing has several tools to contact your customers, from sending a single email, to a more complex system such as autoresponders or automated emails based on your customers' actions.
But what’s the difference between them? We will explain more details about each one in this article, that way you can select or combine the options that better suit your business needs.
Email Blast
An Email blast is a message sent to a group of recipients via email to promote a product, service, or brand. These emails are often part of a marketing strategy and can include content such as promotions, newsletters, product updates, event invitations, or personalized offers.
The primary goals of marketing emails are to engage the audience, drive sales, build brand awareness, and foster customer relationships.
Example of using an email blast: You're running a fall sale and want to let your contacts know about it. You'll send an email blast to send them a one-time message about it.
Autoresponder
An autoresponder is an automated email system that sends pre-written emails in response to a specific trigger or action, such as a user signing up for a newsletter or making a purchase.
These emails are typically part of a single, static sequence and are sent at preset intervals for example, immediately after they sign up, after one day, etc.
They are often used for welcome emails, order confirmations, or basic follow-up sequences.
Examples of using autoresponders: Welcome or Order Confirmation emails. You can set up these autoresponder emails for your subscribers after a certain amount of time they subscribe or make a purchase. Use autoresponders to share important information, offer products, share sales, etc.
Automation
AAutomation is a more advanced system of automated emails based on certain behaviors or conditions triggered by your customers. This could involve multiple pathways depending on how users interact with the emails, for example, opening, or not opening an email, clicking, or not engaging at all.
Email automation can be dynamic and personalized based on user data, behavior, and segments. Examples include drip campaigns, abandoned cart sequences, and behavioral-based email flows.
Example of using automation: Abandoned cart automation. In these cases, if the subscriber makes the purchase, you can send emails related to their purchase, like an order confirmation, how to get an upgrade, etc. If the subscriber doesn’t complete their purchase, you can set up emails to remind them about the product or offer a different product, etc. Those emails will be sent based on the customer's behavior.
In short, an email blast is a message that will be sent as part of an autoresponder or automation campaign.
Autoresponders are simpler, pre-scheduled responses, while automation provides greater flexibility and adaptability, allowing for more personalized and behavior-driven email marketing.
If you have any questions or concerns, feel free to reach out to our team!
We're available and ready to help at support@blastable.com or via our live chat widget.
Cheers,
|
|
Segmenting
-
Segments are a smaller group of contacts within a list. These contacts will be added to a segment according to certain conditions or actions inside the platform.
You can set these conditions when creating a segment according to your purposes.
Requirements:
At least an email list.
|
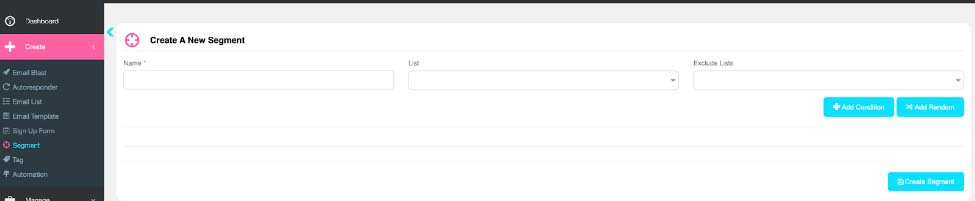
Create an Segment
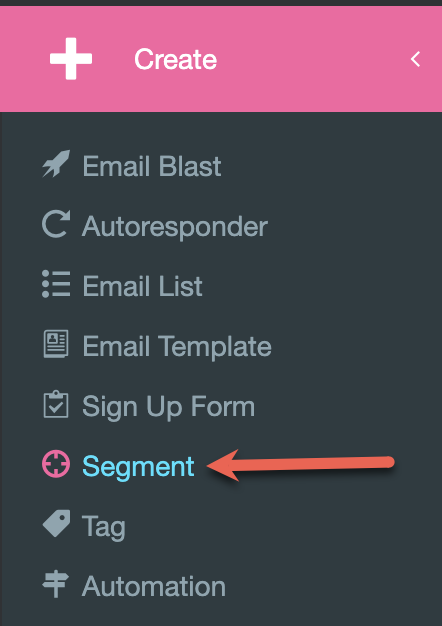
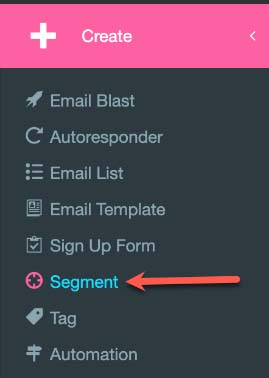
1. From the main menu, click on Create, then click on Segment.
2. Add a Name for your Segment.

3. Add an existing list for the segment you want to create.
4. Optionally, you can exclude any existing list as well.
5. Click on Add Condition to start adding the conditionals.
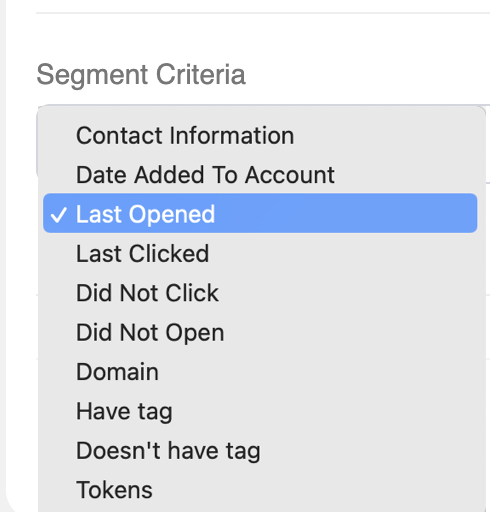
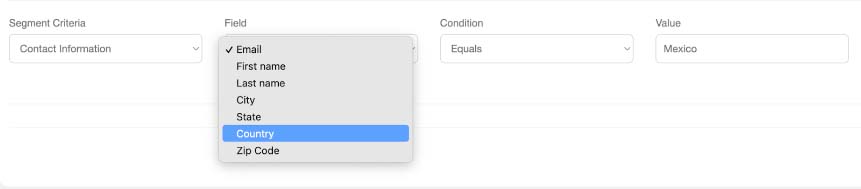
6. Select a Segment Criteria:

This list shows the different criteria you can use to segment your contacts. You can segment the contacts according to their personal information, the date they opened an email or click on a link inside an email, among other criteria.
7. For example, if you want to Segment using the Contact Information criteria, you can select among email, first name, last name and location to segment those contacts. The example above shows a Segment created according to the contact’s Country information.
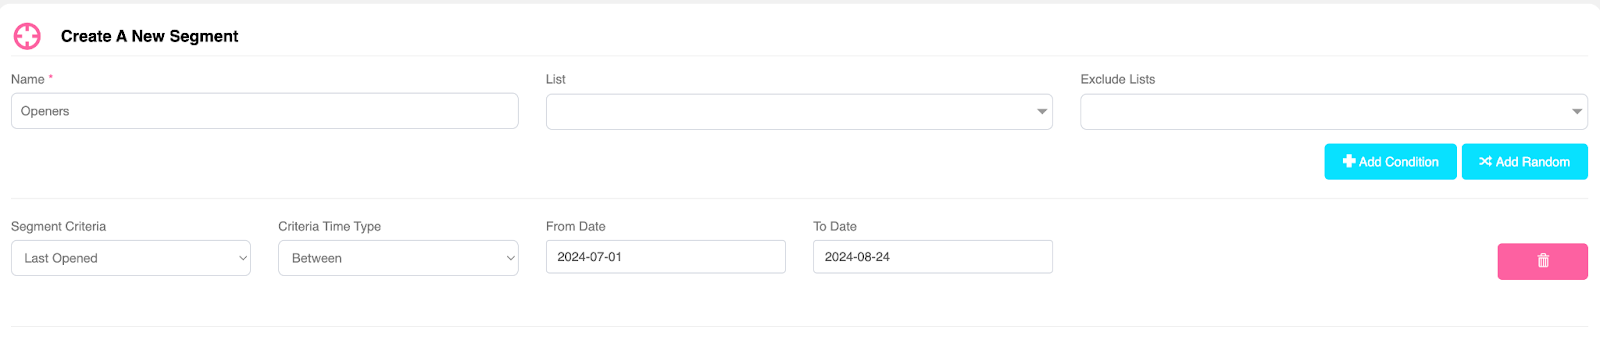
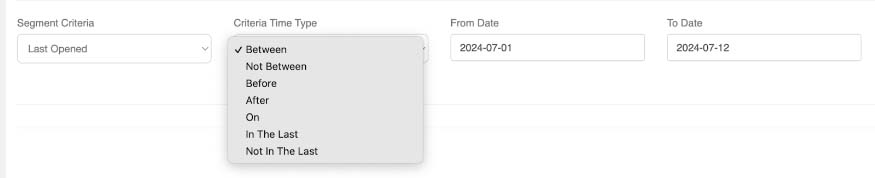
8. Another example, would be to create a Segment of openers or clickers. After selecting the Segment Criteria, in this case “Last Opened”, you can select your desired timeline or a specific date.
9. Once you finish creating your conditions, click on Create Segment at the bottom right side of the screen.
Congratulations! You've successfully created a segment.
Manage your Segments
1. To view your Segments, click Manage, then click on Segments.
2. Click the three dots on the right hand side to manage and edit your Segment
If you have any questions or concerns, feel free to reach out to our team!
We're available and ready to help at support@blastable.com or via our live chat widget.
Cheers,
|
|
-
|
| How to Export A List Or Segment |
|
Once you have your contacts added to a List or Segment, you can export them and save them on your device. These lists will be downloaded in csv format.
For more information on creating lists, please visit this link, or if you want to know how to create a segment, please visit this link instead.
Requirements:
An existing List or Segment
How to Export Your List or Segment
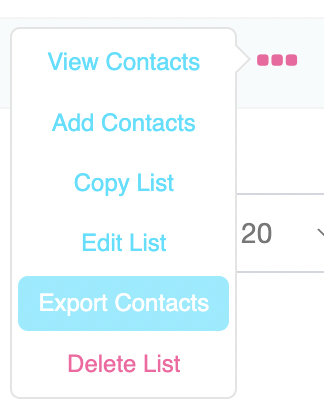
1. From the main menu, click Manage, then Email Lists.
2. Click the three dots at the right of the list you want to export, then click on Export Contacts. (If your list is under 1,000 emails, it will download automatically)
If you have any questions or concerns, feel free to reach out to our team!
We're available and ready to help at support@blastable.com or via our live chat widget.
Cheers,
|
|
-
|
| Create: How to Create a Segment of Openers
|
|
-
In some cases, you will need to delete a specific Segment within a list. For example, you might want to delete a Segment of non-openers to clean up your lists.
But how to remove only a segment without affecting the rest of your list? We will guide you step by step into the process.
Requirements:
At least one list created |
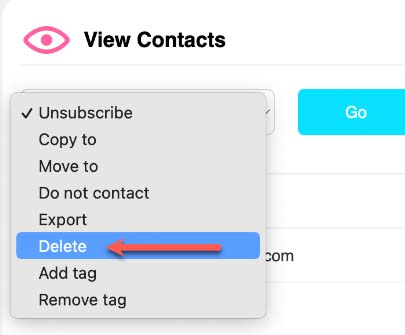
Create a Tag
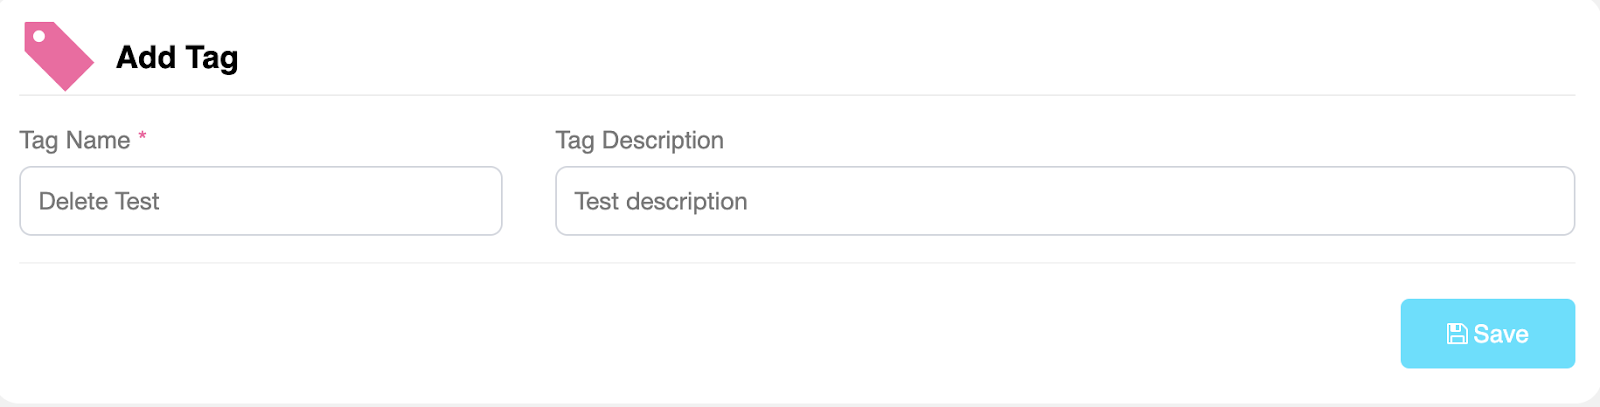
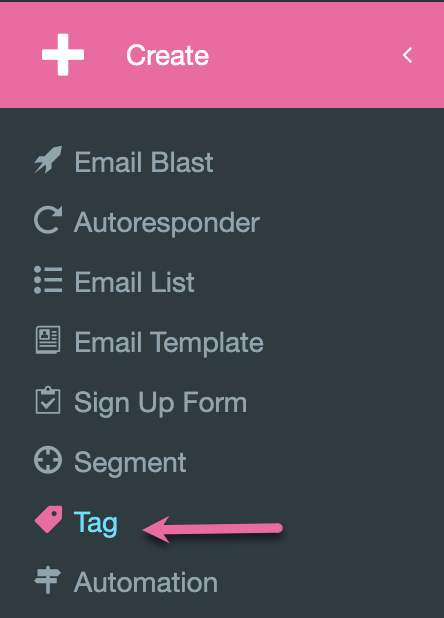
1. From the main menu, click on Settings then click on Tag.
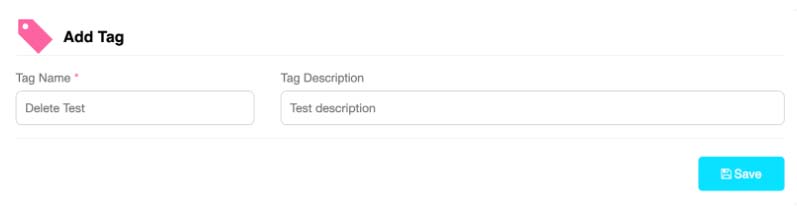
2. Add a Name for your tag and optionally, a description. For this example, we used the name “Delete Test”.
3. Click on Save.
Upload Contacts
In this step, you need to upload the contacts you want to remove from your Segment.
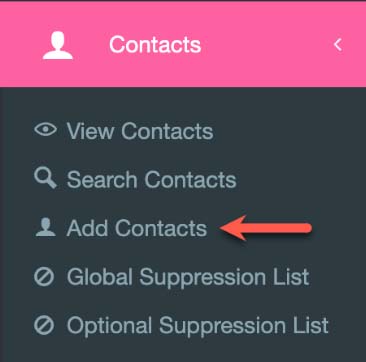
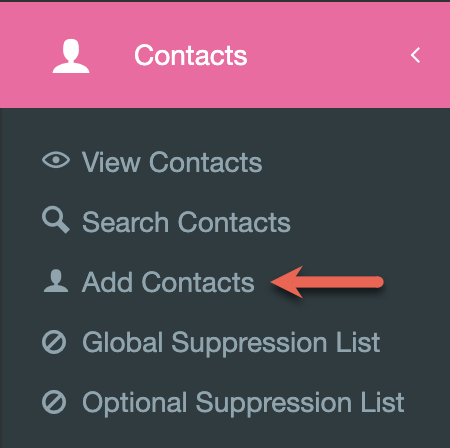
1. From the main menu, click on Contacts, then Add Contacts.
2. On the Map Field Names page, choose your Tag from the drop down menu.
3. For the “Please Select What To Do If The List Has Existing Users With Same Email?” choose “Update”.
4. Upload the list to the same list the contacts are already on.
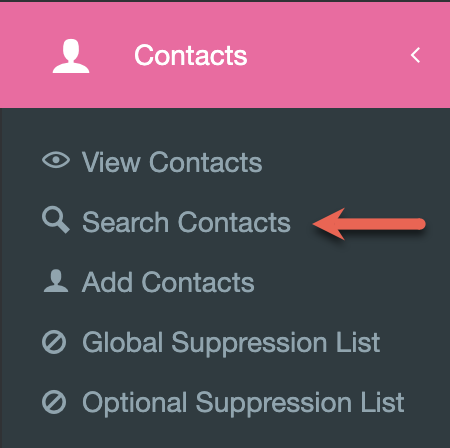
5. Once approved, visit Contacts, then Search Contacts.
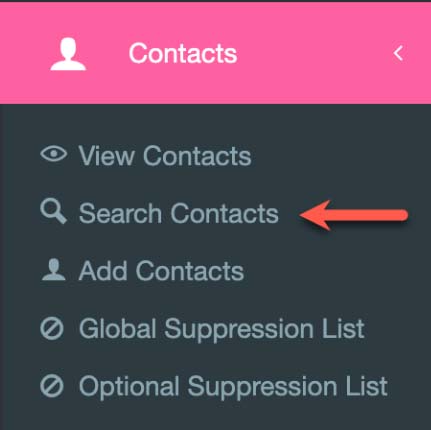
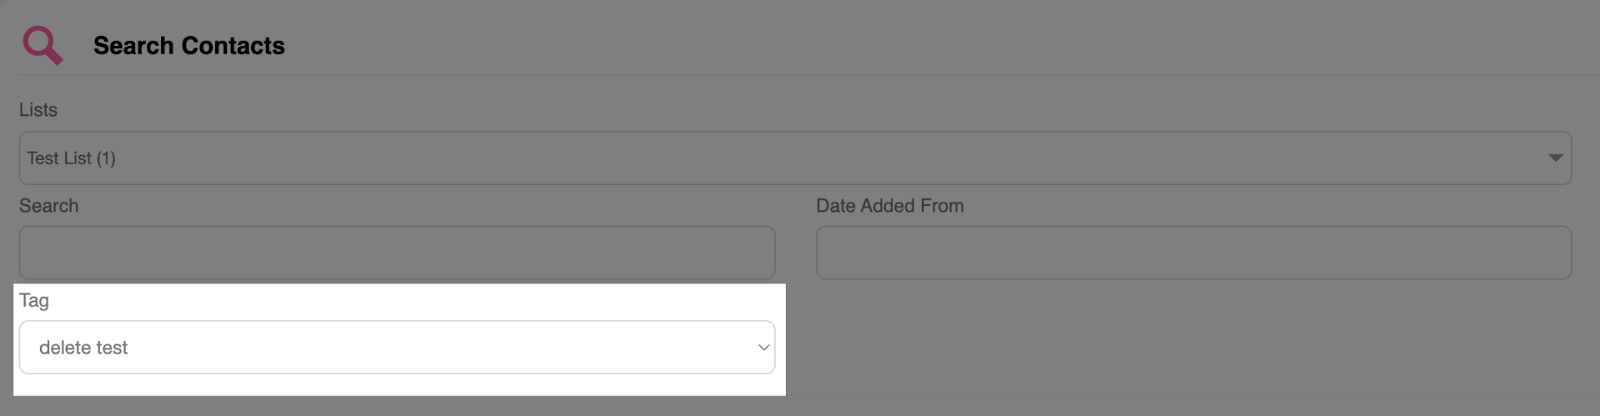
6. Search contacts by the Tag you created in the first step.
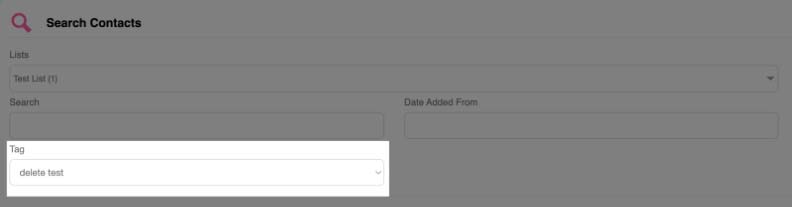
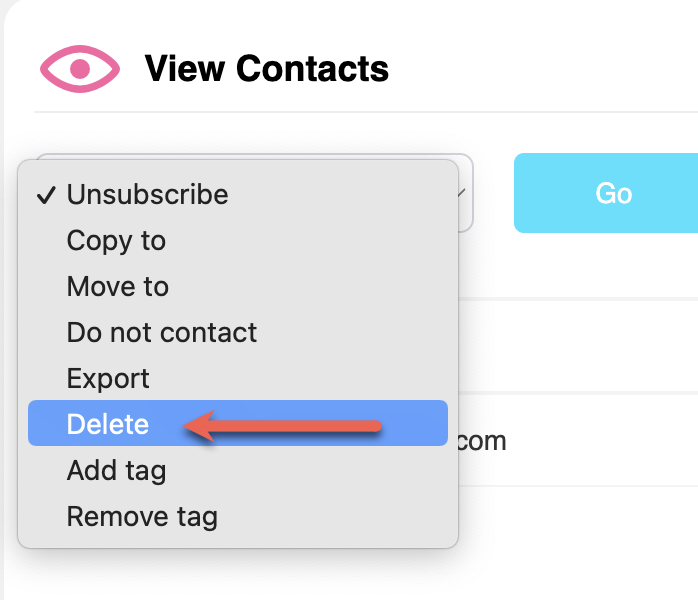
7. Select the tagged contacts using the check box and choose Delete from the drop-down menu.
Congratulations! You have successfully learned how to delete Segments.
If you have any questions or concerns, feel free to reach out to our team!
We're available and ready to help at support@blastable.com or via our live chat widget.
Cheers,
|
|
-
|
| How to Delete a Segment of Non Openers |
|
Sometimes, you will need to delete a specific Segment within a list. For example, you might want to delete a Segment of non-openers to clean up your lists.
But how can you remove only a segment without affecting the rest of your list? We will guide you through the process step by step.
Requirements:
At least one list created
Create a Tag
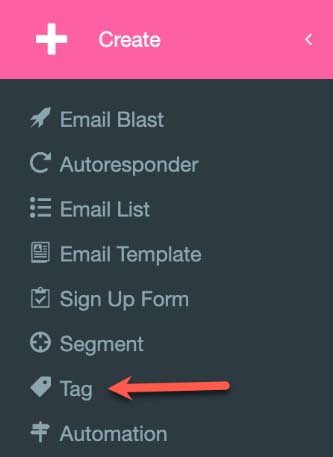
1. From the main menu, click Create, then click on Tag.
2. Add a Name for your tag and, optionally, a description. For this example, we used the name “Delete Test.”
3. Click on Save.
4. Click Add Condition, and select the Did not open for the criteria. Select the desired date range.

5. Click on Save Changes.
Upload Contacts
In this step, you must upload the contacts you want to remove from your Segment.
1. From the main menu, click on Contacts, then Add Contacts.
2. On the Map Field Names page, choose your Tag from the drop-down menu.
3.
For the “Please Select What To Do If The List Has Existing Users With Same Email?” choose “Update”.
4.
Upload the list to the same list the contacts are already on.
5.
Once approved, visit Contacts, then Search Contacts.
6. Search contacts by the Tag you created in the first step.
7. Select the tagged contacts using the check box and choose Delete from the drop-down menu.
Congratulations! You have successfully learned how to delete Segments.
If you have any questions or concerns, feel free to reach out to our team!
We're available and ready to help at support@blastable.com or via our live chat widget.
Cheers,
|
|
-
Tags help us organize and search our contacts by different categories. They can also provide valuable context about each contact.
Requirements:
Feature only available in Pro Plans
How to Create Tags
1. From the main menu, click Create, then Tag.
2. Add a Name for your Tag and Optionally a Description.

3. Click on Save.
How to Add Tags to a Contact
Once you have created your tags, you can add them to your contacts.
Tag single contacts:
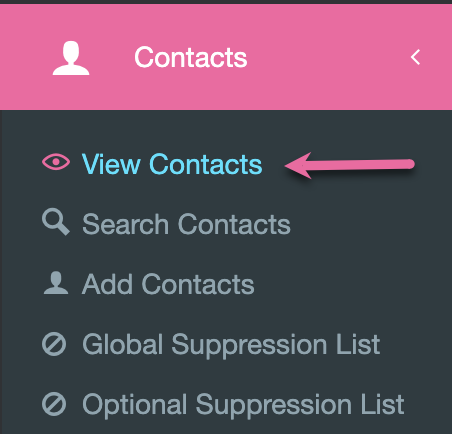
1. Click on Contacts, then View Contacts.
2. Locate the contact you want to tag, and click the three dots menu on the right side.
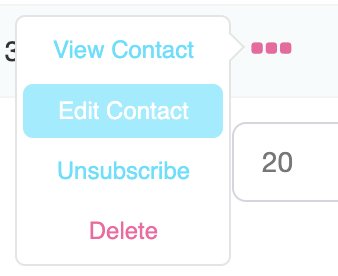
3. Click on Edit Contact.
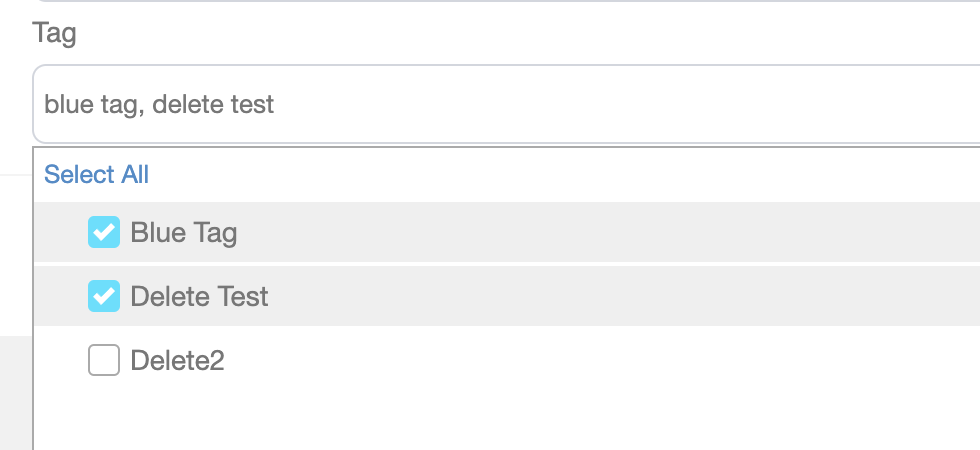
4. In the contact profile, you will find a Tag drop-down menu, you can select the tags you want to add.
Tag more than one contact:
1. Click on Contacts, then View Contacts.

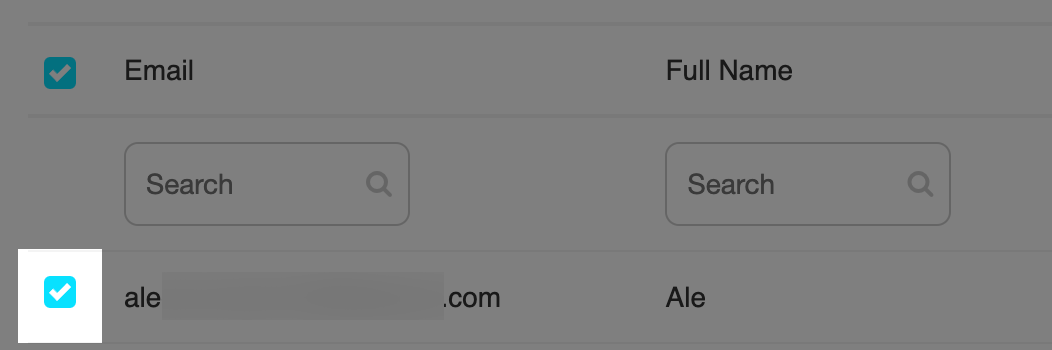
2. Select the desired contacts by clicking on each checkbox.
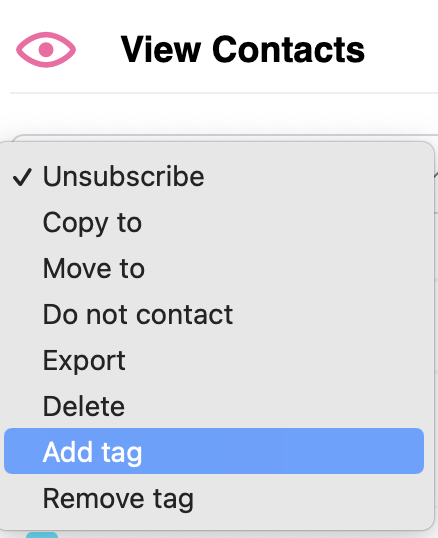
3. A new menu will appear at the top of the page, select “Add Tag”.
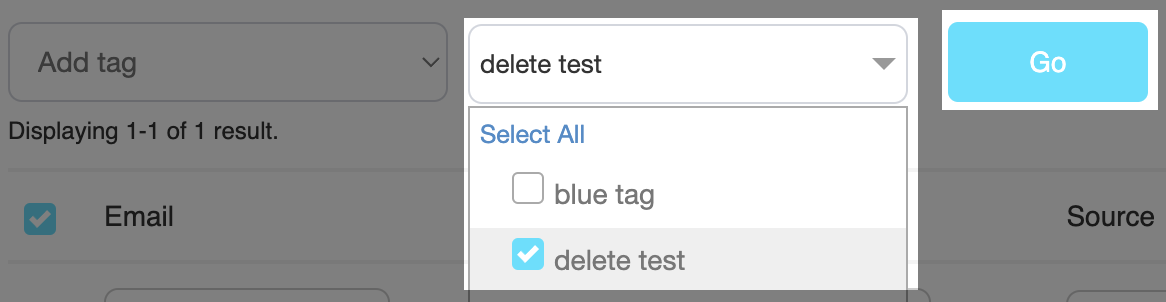
4. Select the desired tags from the drop-down menu and click on Go.
How to import a CSV file with tags
You can import lists with previously added tags into Blastable. To do this, you need an existing list in CSV format.
This is an example of how the list should look, columns must categorize the information and each column needs to have a label.
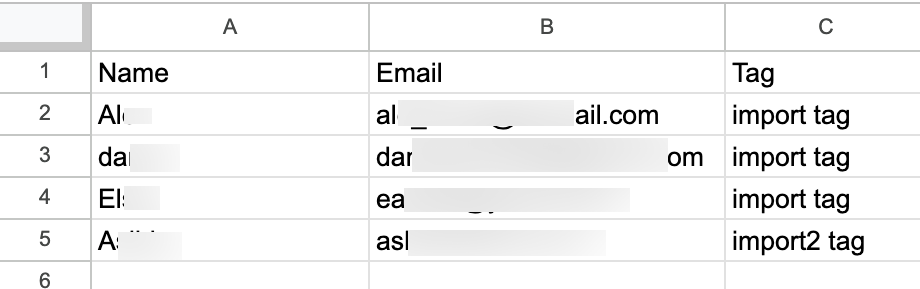
1. To upload your list, click on Contacts, then Add Contacts.
2. You can drag and drop your file, or uploading by clicking Select File.
3. After adding your file, click on Upload.
4. Now, you need to map the fields. Some of them are automatically detected, but you might need to manually map others.

5. This is how they should look like:

6. Once finished mapping the fields, click on Next.
7. Select a List to add your contacts to, and click on Add Contacts.

8. You will see the Status as “Pending Approval”, once is completed it will change to “Active”.
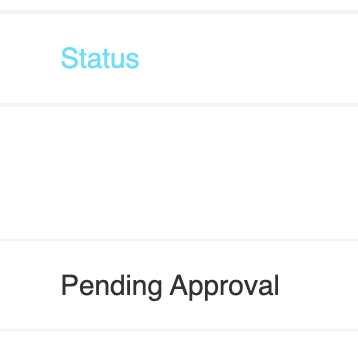
Please note that this process can take a few moments to complete.
If you have any questions or concerns, feel free to reach out to our team!
We're available and ready to help at support@blastable.com or via our live chat widget.
Cheers,
|
|
Managing Your Account
-
-
|
| How To Upgrade Your Account |
|
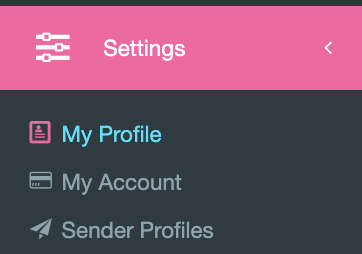
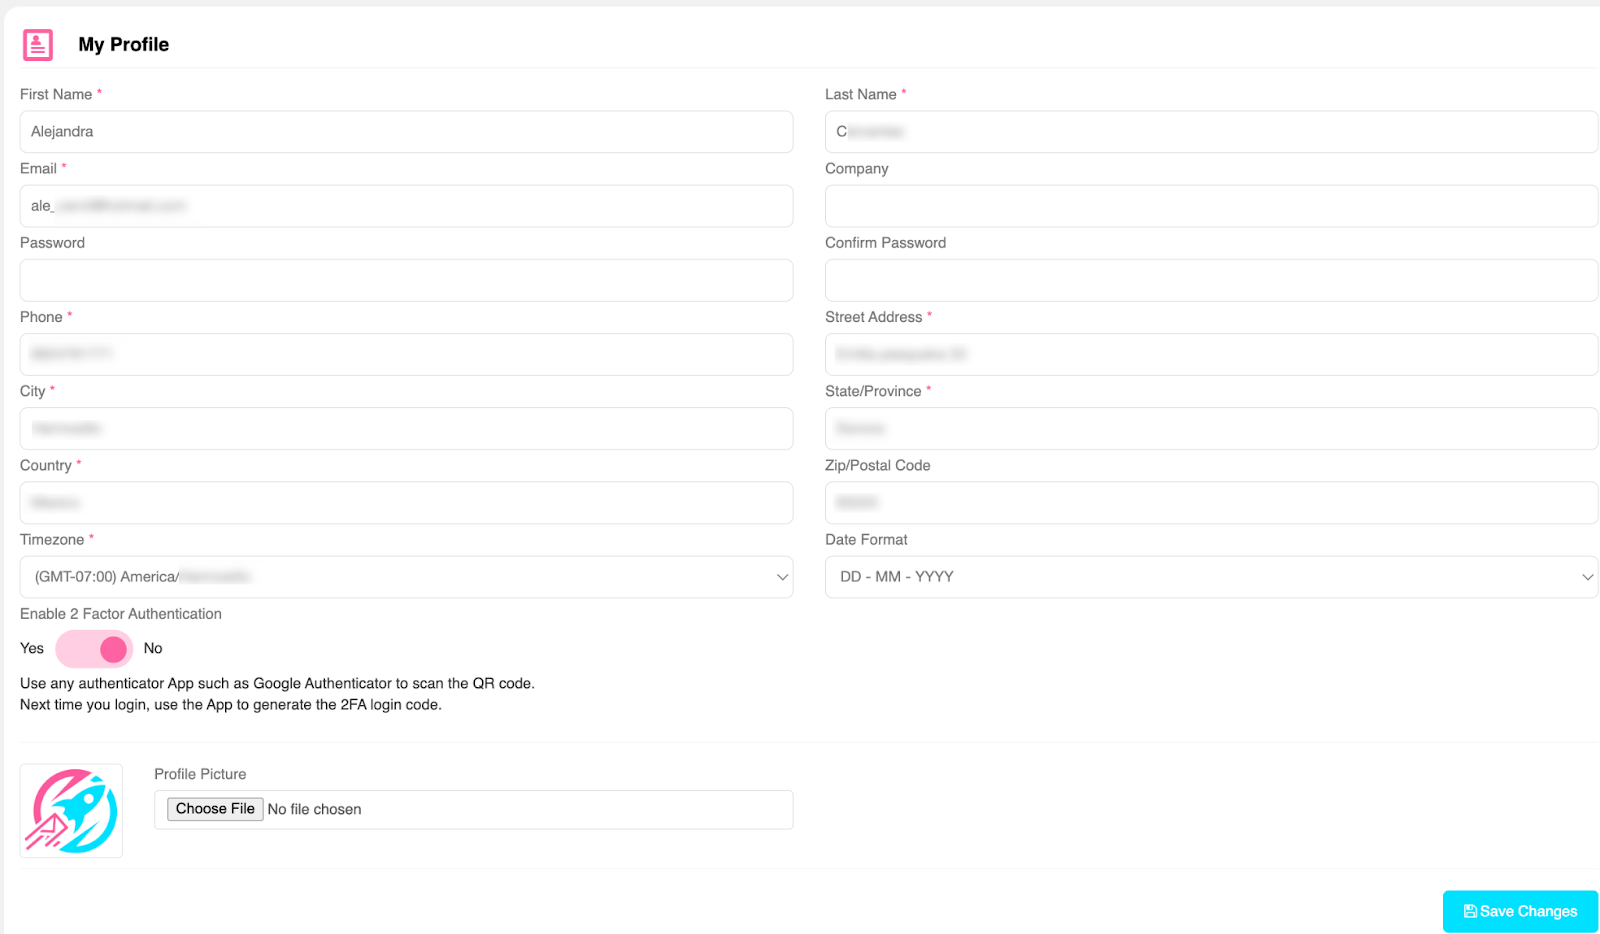
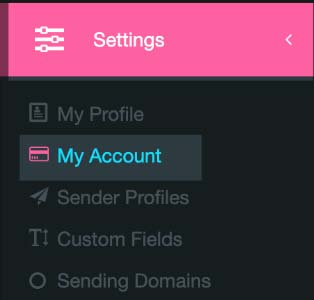
1. From the main menu, click on Settings, then click My Profile.

2. You will see all the plans available and the plan you are currently on will be highlighted.
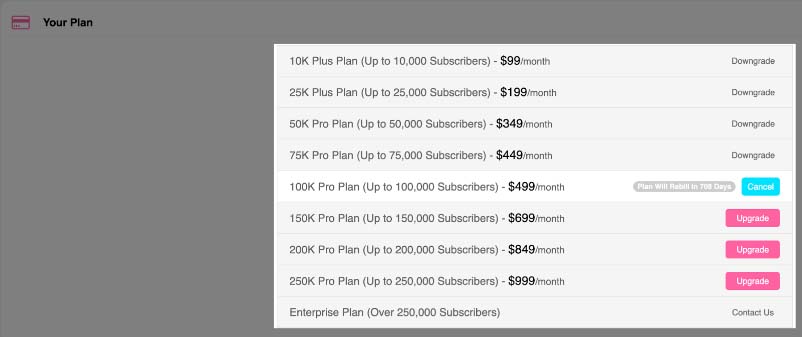
3. Click on Upgrade according to the plan you selected.
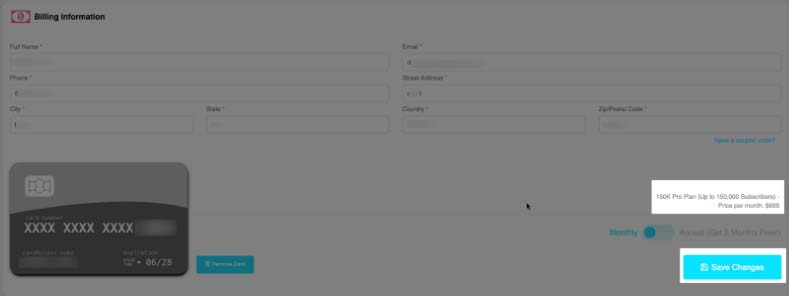
4. You will be taken to the Billing section to confirm the new plan. Click on Save Changes.
Congratulations! Now you know how to upgrade your Blastable Account.
Congratulations! Now you know how to upgrade your Blastable Account.
If you have any questions or concerns, feel free to reach out to our team!
We're available and ready to help at support@blastable.com or via our live chat widget.
Cheers,
|
|
-
|
| How To Update Your Payment Method |
|
Upgrading your payment methods is a breeze! If at some point of your journey you need to switch your payment method, please follow these simple steps to update your information.
1. From the main menu, click on Settings, then click My Profile.

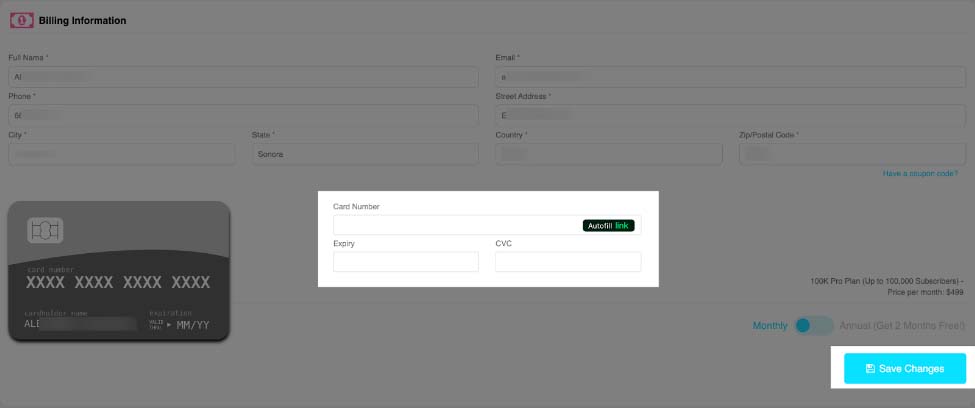
2. Scroll down until you reach the Billing Information area.
3. Update your card information as you please and then click on Save the Changes.
Congratulations! Now you know how to update your Payment method.
If you have any questions or concerns, feel free to reach out to our team!
We're available and ready to help at support@blastable.com or via our live chat widget.
Cheers,
|
|
-
In Blastable you can enjoy our different features according to the plan you select. We have two different plans created especially to fill your needs. Keep reading to know more details about our plans.
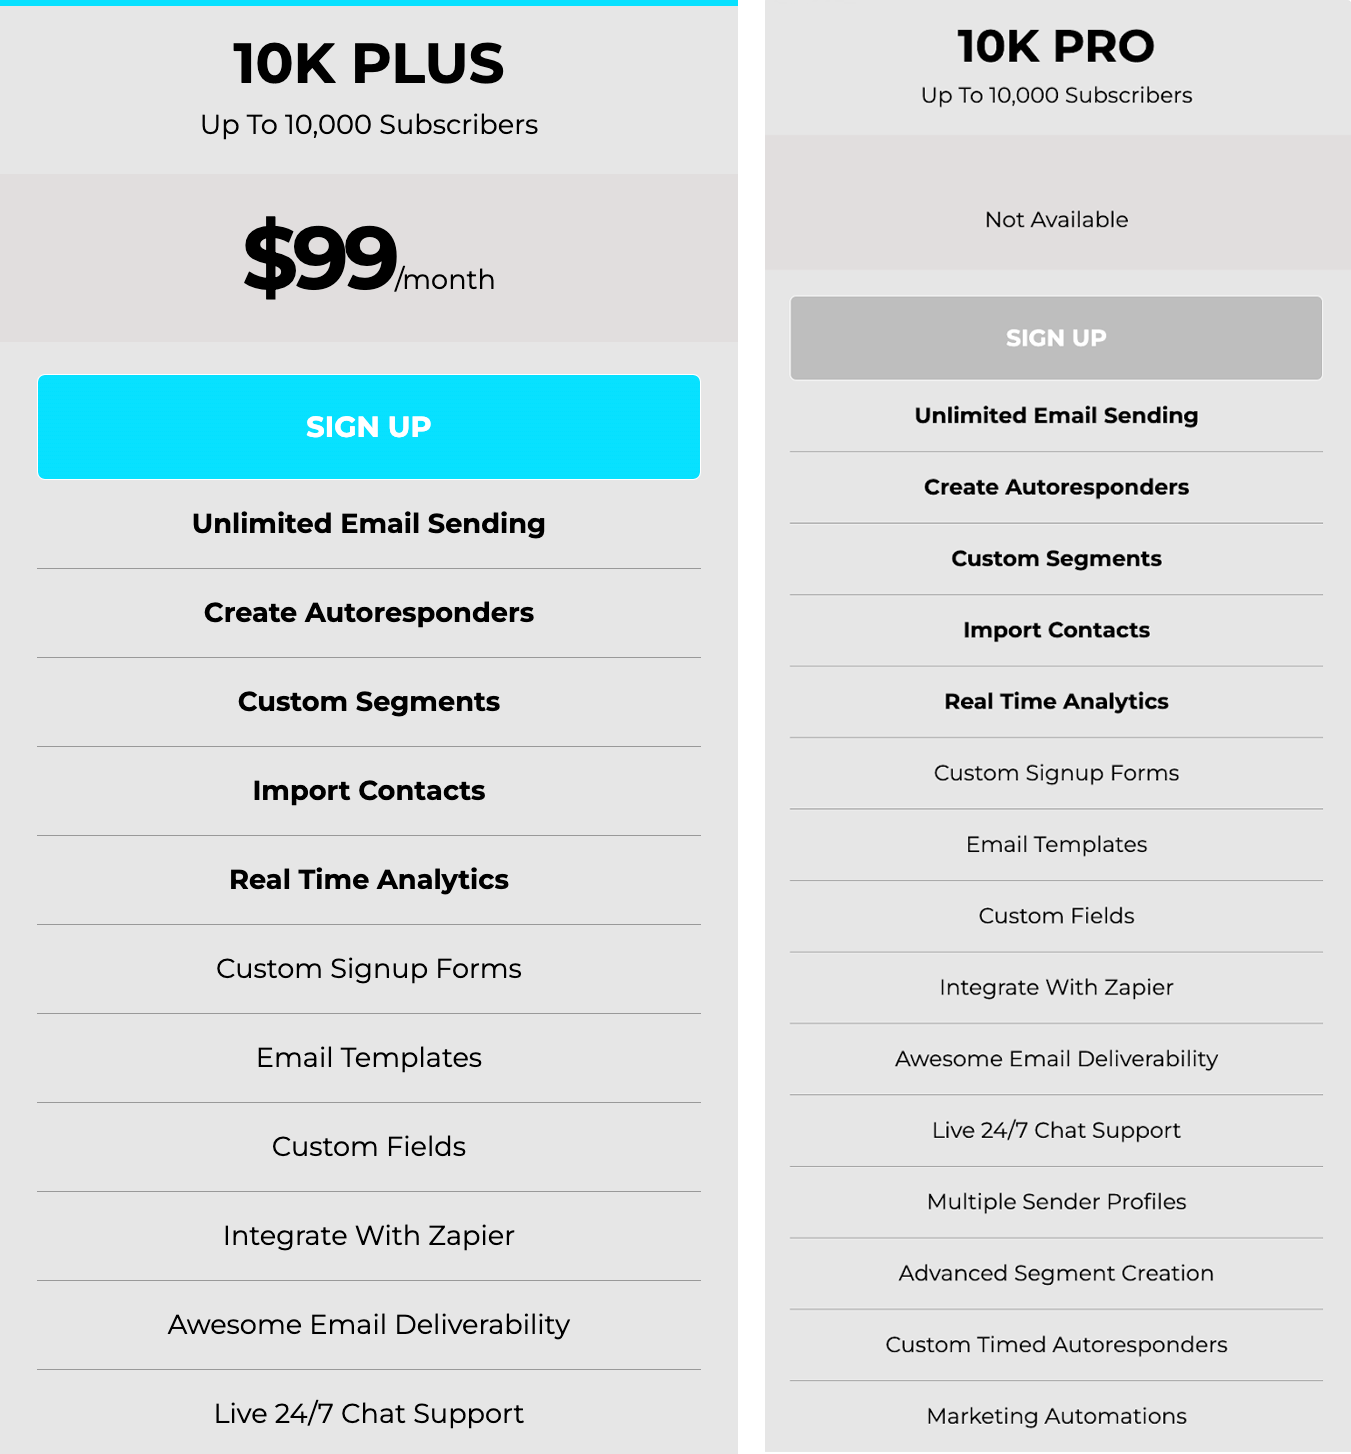
Plus Plan
With our Plus Plan, you can enjoy all these features for only $99 per month.
- Up to 10,000 subscribers
- Unlimited Email Sending
- Create Autoresponders
- Custom Segments
- Import Contacts
- Real Time Analytics
- Custom Signup Forms
- Email Templates
- Custom Fields
- Integrate With Zapier
- Awesome Email Deliverability
- Live 24/7 Chat Support
Pro Plan
If you decide to upgrade to our Pro Plan, you can enjoy all the features in the Plus Plan, and these additional features:
- For 50,000 subscribers and more
- Multiple Sender Profiles
- Advanced Segment Creation
- Custom Timed Autoresponders
- Marketing Automations
Our Pro Plans start with our 50K Pro which is $349 per month. Pro plans go up from there depending on the number of subscribers.
Visit our pricing page any time for further information so you can select the right plan for your business needs!
If you have any questions or concerns, feel free to reach out to our team!
We're available and ready to help at support@blastable.com or via our live chat widget.
Cheers,
|
|
-
|
| What To Do When Your Sending Gets Disabled |
|
So your sending got disabled on Blastable… now what?
Disabled sending can happen for multiple reasons…
- Mainly, it is due to consistently low open rates.
- Another reason could be due to sending misleading or spammy content.
The reason we have to disable sending for certain mailers is because each person’s mailing has an effect on our IPs. That means if your mailings don’t perform well, it has a negative impact on Blastable’s overall deliverability. And since we are a deliverability based software, we have certain mailing protocols in place to protect the integrity of our shared IPs.
Now unless your mailings have been aggressively bad, in which case you’ll get disabled immediately, we’ve likely reached out to you more than once to warn you that your account is in danger of getting disabled and provided you with steps on how to improve. If you’re here, you may not have seen those emails, or something else. But not to worry, we’re here to help you get your mailing back on track and better than ever before!
Remember that this process not only protects Blastable, your trusty ESP, but the biggest bonus for you is that you’re going to actually get way better mailing results using this process. So you’re in the right place :)
Ok, so now that you understand what’s going on with disabled sending, here’s what you need to do to get re-enabled.
STEP 1:
Create a segment of your 30 Day Openers.
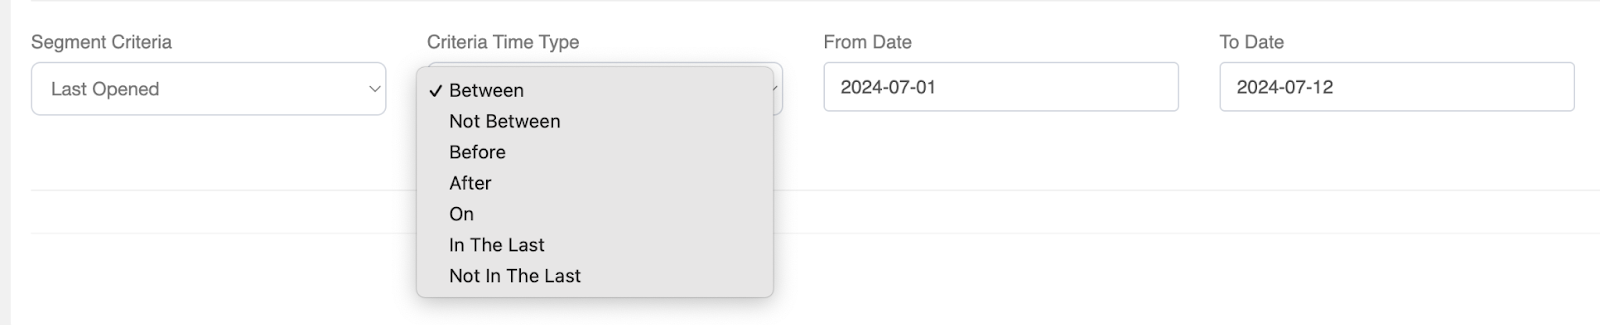
(These are your most recent, engaged subscribers = good!)
→Click here for directions.
Make sure to use the correct criteria for this:

STEP 2:
Delete the rest of your contacts off of Blastable.
Important:
- Save and export your contacts first so you don’t lose any data.
- *We do not store data so do not come crying if you deleted all your contacts and can’t get them back. We will not be able to restore them for you so read all of these directions thoroughly.
Please Note:
- You can slowly start to reintegrate your old list and add contacts back in, bit by bit, as your mailing improves and as you create sustained better results.
- Specifically, you’ll need open rates in the range of 15-20% minimum, consistently.
- In the meantime, as you reestablish your sending, any contacts outside of your 30 day openers must be removed from our platform in order for you to be able to mail again.
Here’s how to delete the rest of your contacts off of Blastable while maintaining your 30 day openers.
Your segment criteria should look like this:

STEP 3:
After steps 1 and 2 are complete, reach out to our team at support@blastable.com to let us know that you have completed these steps. We will review your account to ensure steps 1 and 2 are done, at which point we can re-enable your sending.
Please Note:
- If your open rates continue to decline after getting re-enabled, or if you continue to send spammy content, you will get disabled again.
- Disabled sending is temporary and does not cancel an account, so address this as swiftly as possible to continue using your account :)
STEP 4:
Alright so let’s assume you’re back to mailing now. What’s next?
- Begin with only mailing your segment of openers.
- Re-establish a strong sending reputation, consistently getting open rates of at least 15-20%.
- Once you build a little rhythm here, you can import your next list to blastable.
- You must follow our best mailing practices.
If you have any questions or concerns, feel free to reach out to our team!
We're available and ready to help at support@blastable.com or via our live chat widget.
Cheers,
|
|
-
|
| How To Cancel Your Account |
|
Thank you so much for the time you spent with us here at Blastable! We are so sad to see you go!
If there's anything we can do to make you stay, reach out to our support at support@blastable.com so we can help you.
If you're sure you'd like to bid us adieu, follow these steps to cancel your account:
1. From the main menu, click on Settings, then click My Profile.
2. You will see all the plans available and the plan you are currently on will be highlighted.

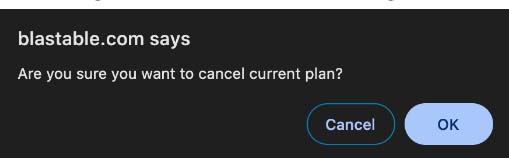
3. Click on Cancel.
4. You will get a confirmation message. Click on OK.
5. Once your plan is canceled you will see this confirmation text.

6. You can also confirm your plan was canceled by checking your billing history at the bottom of the page.

After canceling, you will not be billed again and you will have access to your account until the end of your billing period.
If you have any questions or concerns, feel free to reach out to our team!
We're available and ready to help at support@blastable.com or via our live chat widget.
Cheers,
|
|
|